Project Workspace
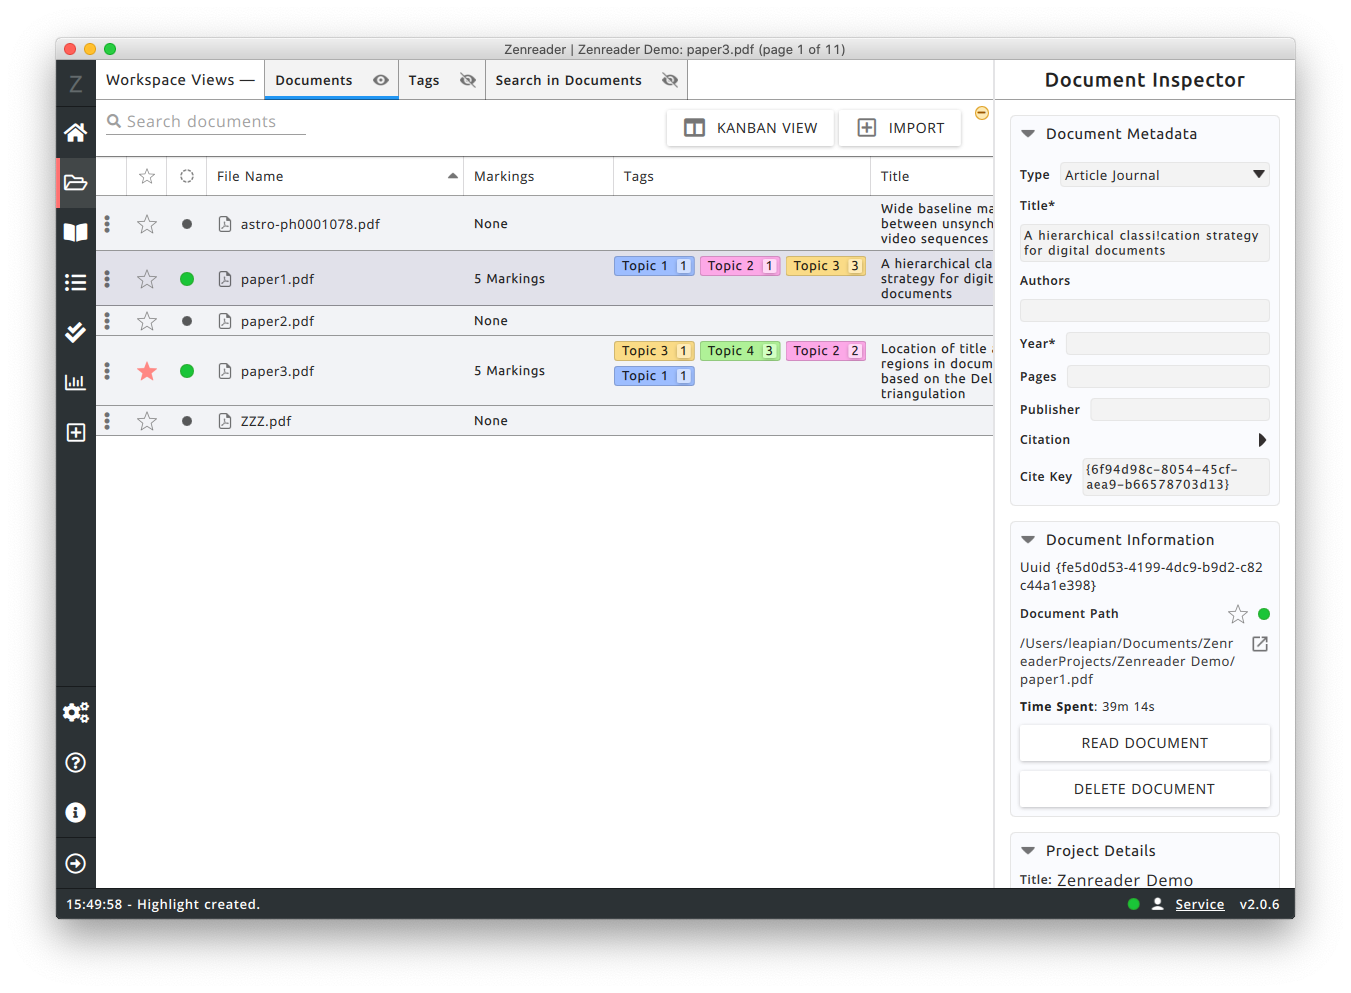
In Zenreader, you work with projects. A project consists of a collection of PDF documents, with all the highlights, notes, tags, outlines and tasks that you produce within this project.
Each project is saved in a folder on your computer.
Workspace Panels
- Documents - This panel presents a table with all the imported documents and references within the project.
- Tags - This panel allows you to create, edit and remove tags for the whole project. It is hidden by default.
- Search in Documents - In this panel, you can search for words in any of the documents you have imported. N.B. You must first have opened a document at least once, before the search works. It is hidden by default.
The Document Inspector sidebar will allow you to modify the reference information for each document.
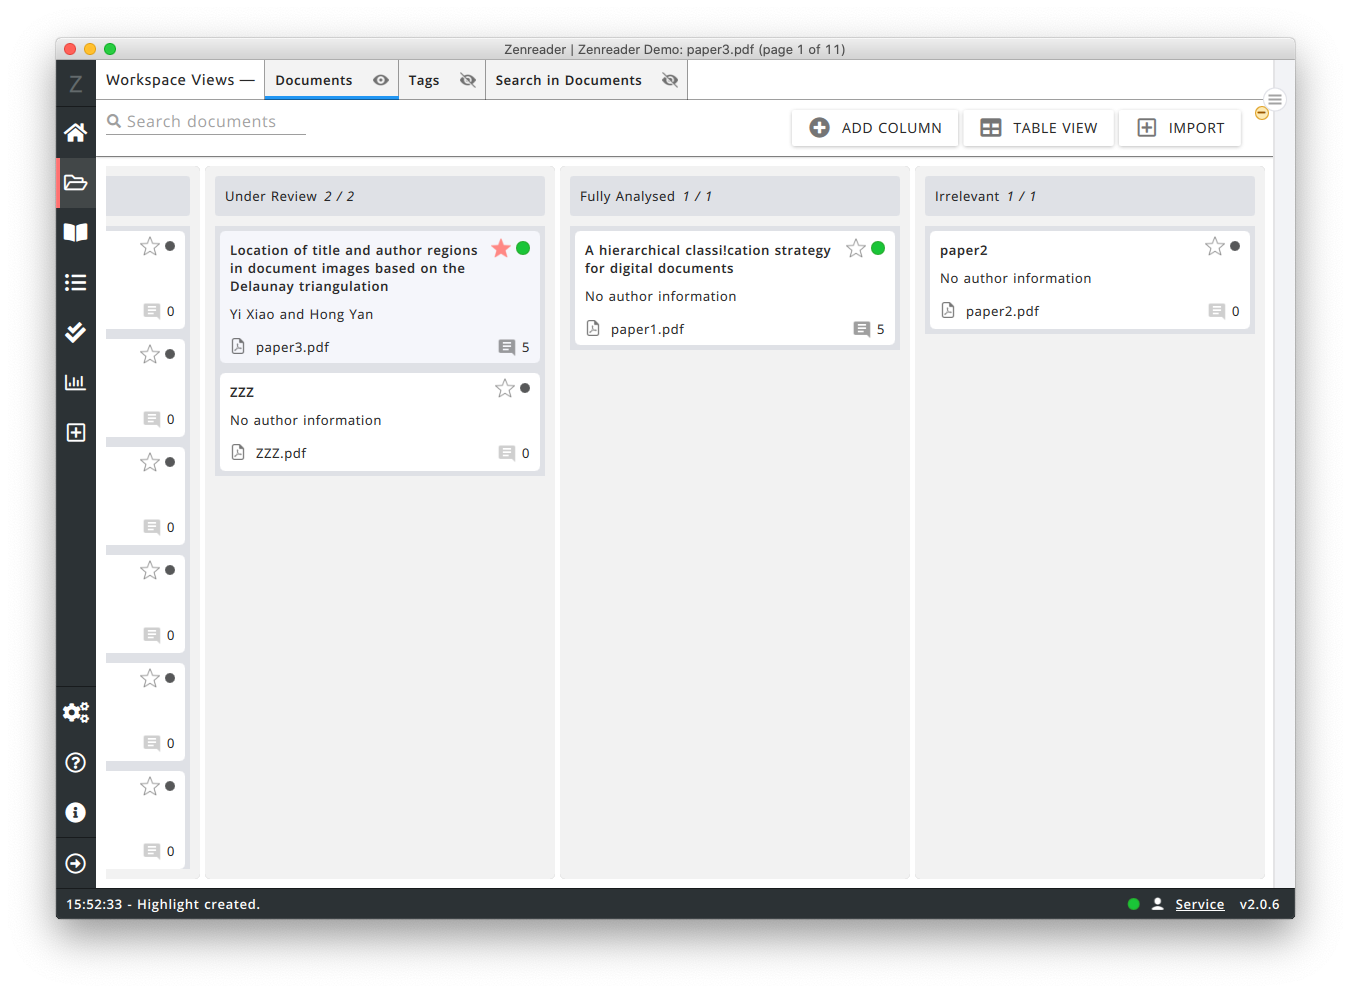
Clicking on Kanban View allows you to switch to the Kanban View.
- Create new columns as needed. For example: "To Read", "Read", "Critical Documents"
- Move documents from one column to the next by dragging and dropping them, thus having a clear overview of what needs doing with each document
Create a New Project
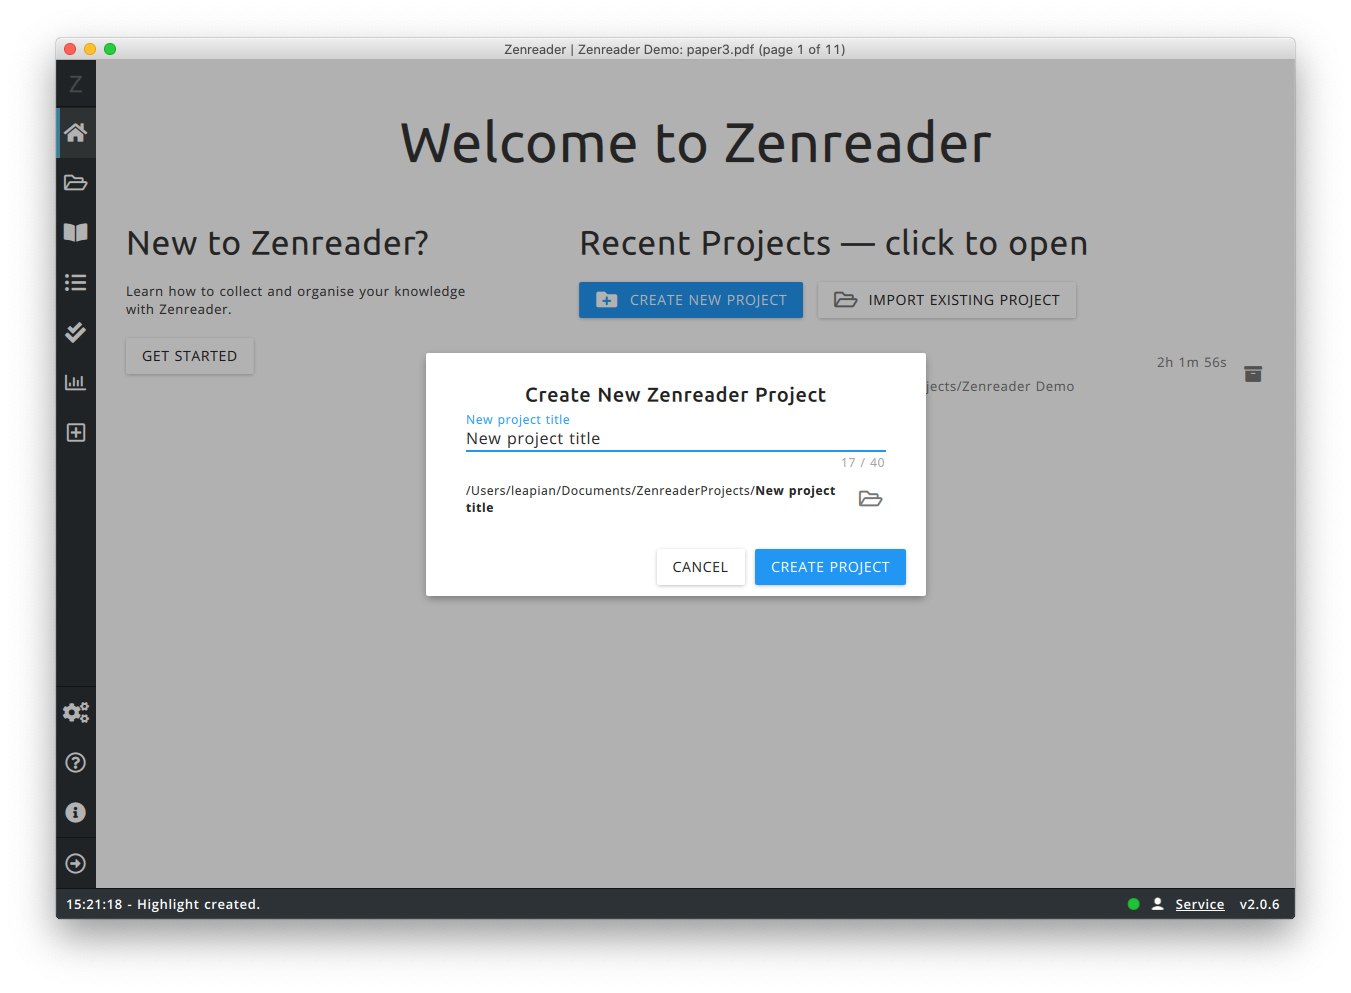
- Go to the Welcome Screen and click
Create New Project - Enter the prefered project name
- Optional: Change the default folder where the project is stored. By default projects are saved in your Documents folder.
- Click "Create Project"
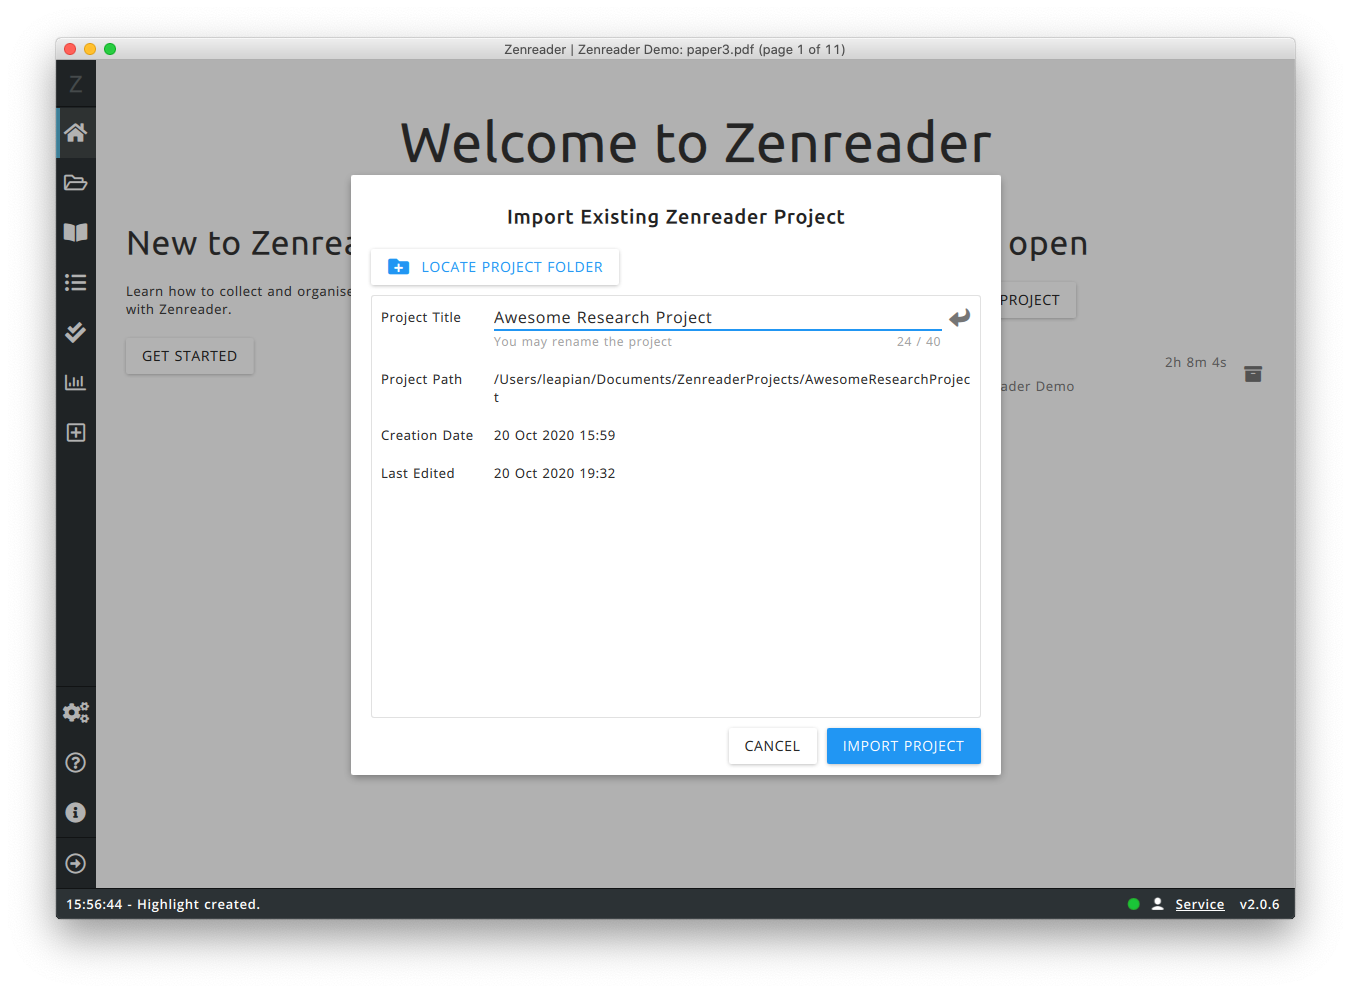
Import an Existing Project
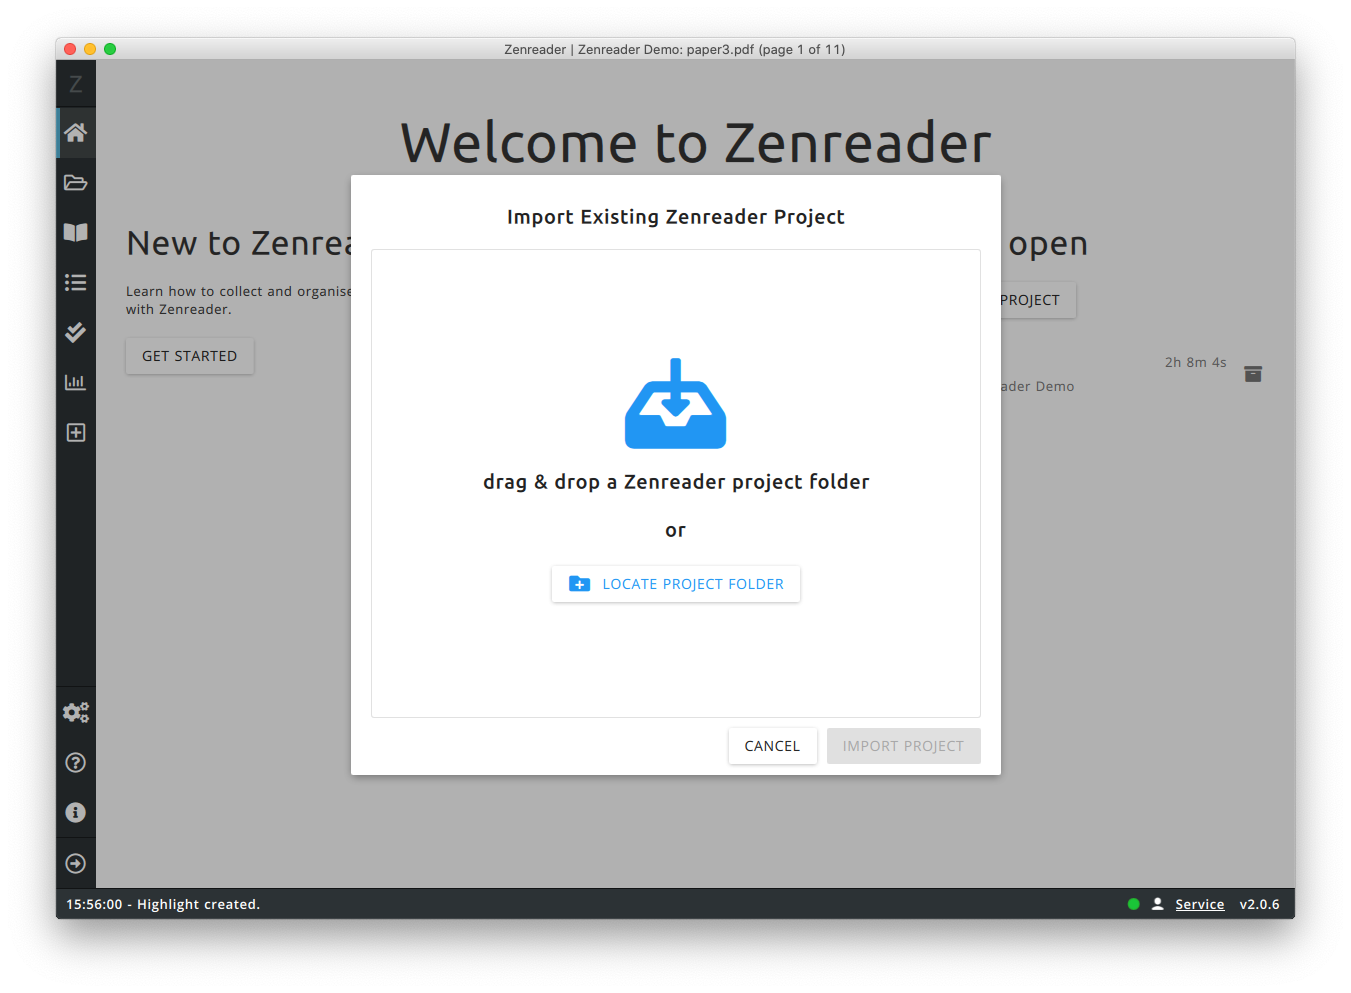
- Go to the Welcome Screen and click
Import Existing Project -
Choose the project folder after clicking
Locate Project Folder -
Confirm the import of the project.
N.B. This operation requires the project folder to contain a zenreaderProject subfolder, where we save all the internal project data.
Import documents into a project
To import documents or bibliographic information, you must open the document import screen. This can be done in several ways:
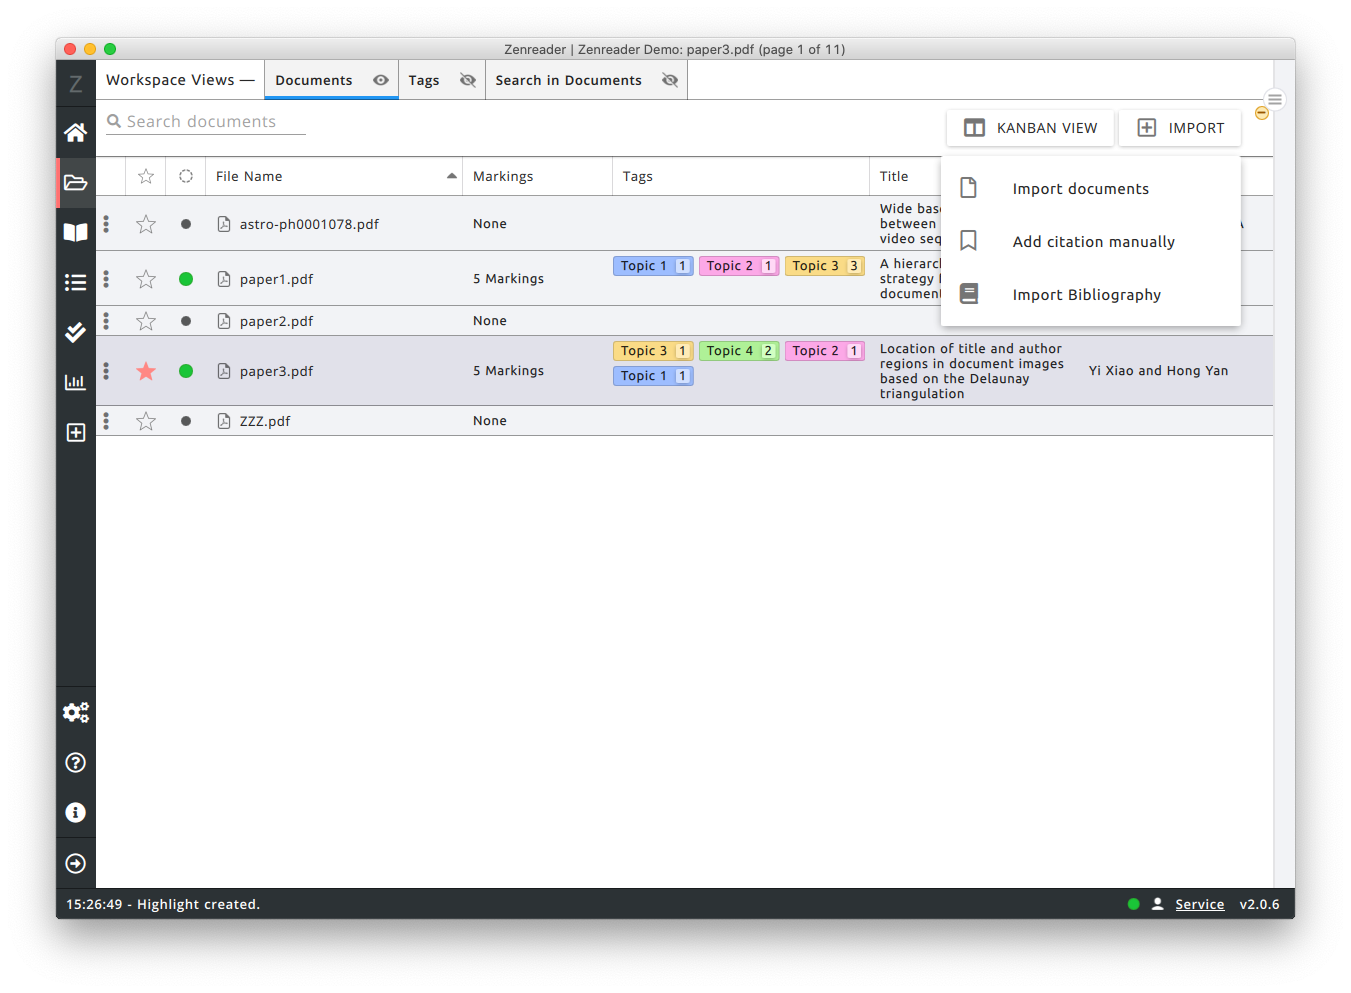
- 1| With a project open, navigate to the Project Workspace screen. Click
Importand choose one of the options.
- 2| Dragging and dropping a folder, a PDF document or a list of PDF documents from your file system anywhere in Zenreader (when a project is open)
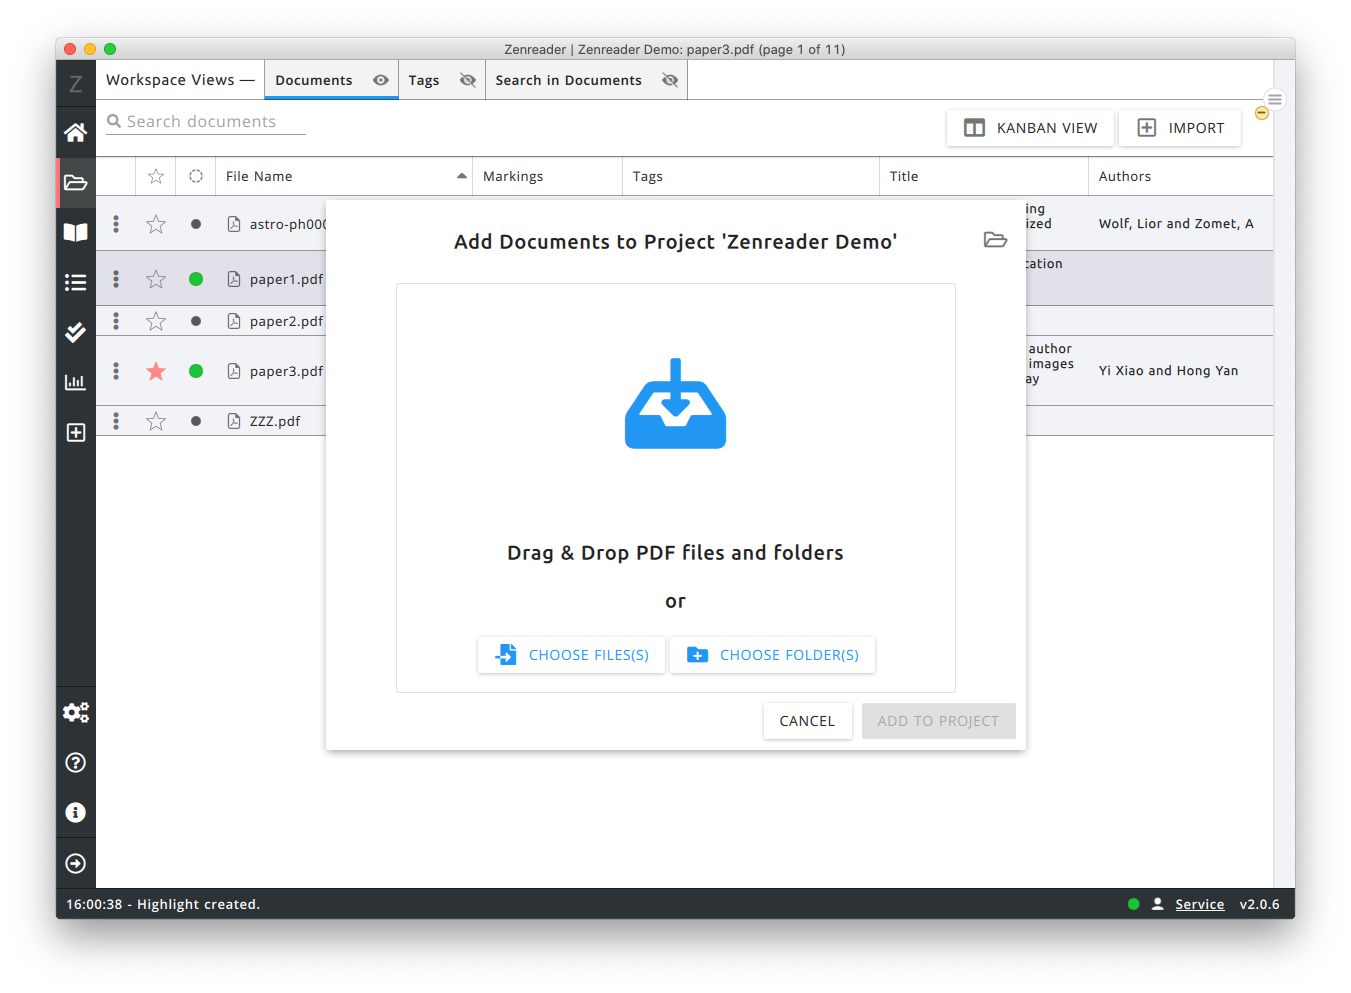
Import Document Screen
- You can click Add file(s) and select PDFs to add to a project
- You can click Add folder and select folders that will be scanned recursively for PDF documents. All documents will be added for import
- You can directly drop files and folders and these will be added to the import
You can download webpages by entering valid URLs and a file name
Webpage Import
We are very sorry for any inconveniences caused by the Webpage Import missing
In September we took the decision to disable the direct webpage import in Zenreader because we were relying on a highly defective third party tool which meant that many of our users could not actually import webpages.
We are working on replacing that component with an alternative tool (the web importer converted webpages into PDFs that were then added to a project).
What you can do at the moment:
-
Use your favourite browser to find webpages.
-
You can then export the webpage to PDF (we recommend scrolling to the bottom of the page so that all the images load properly and then hitting File → Save As … or heading to the webpage Print options).
-
From these two options you should be able to generate a PDF export of the webpage. Then you can just drag and drop that into your Zenreader project and start highlighting.
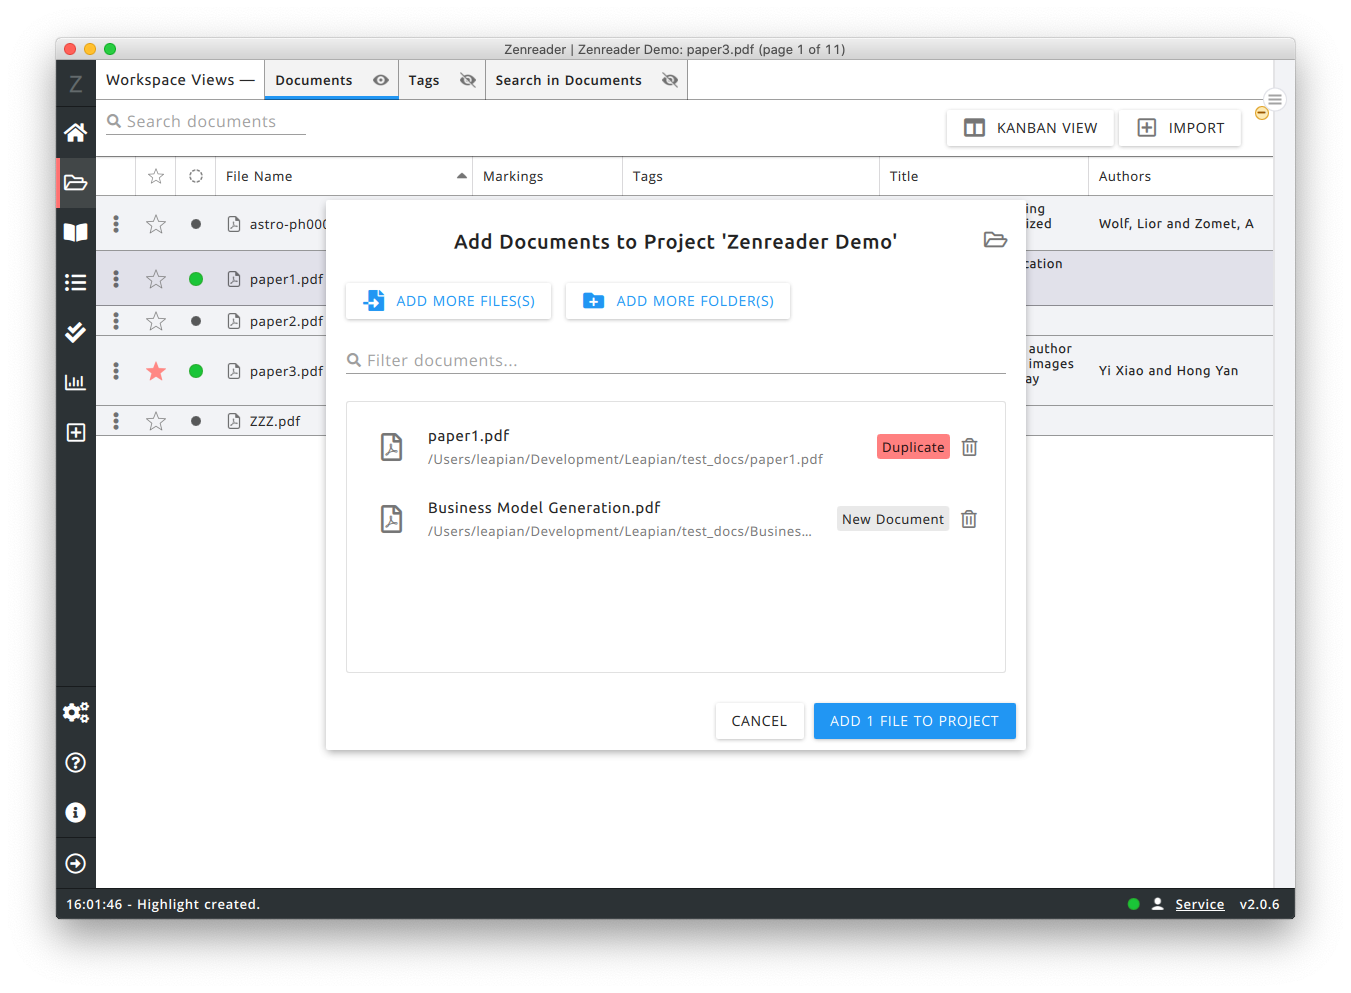
Zenreader detects duplicate documents by comparing file sizes and if file sizes match, comparing the full contents of the file. Duplicates are hidden and will never be imported.
When you are done adding documents, just click Add ... file to project and the documents will all be copied over into the project folder and become available for reading.
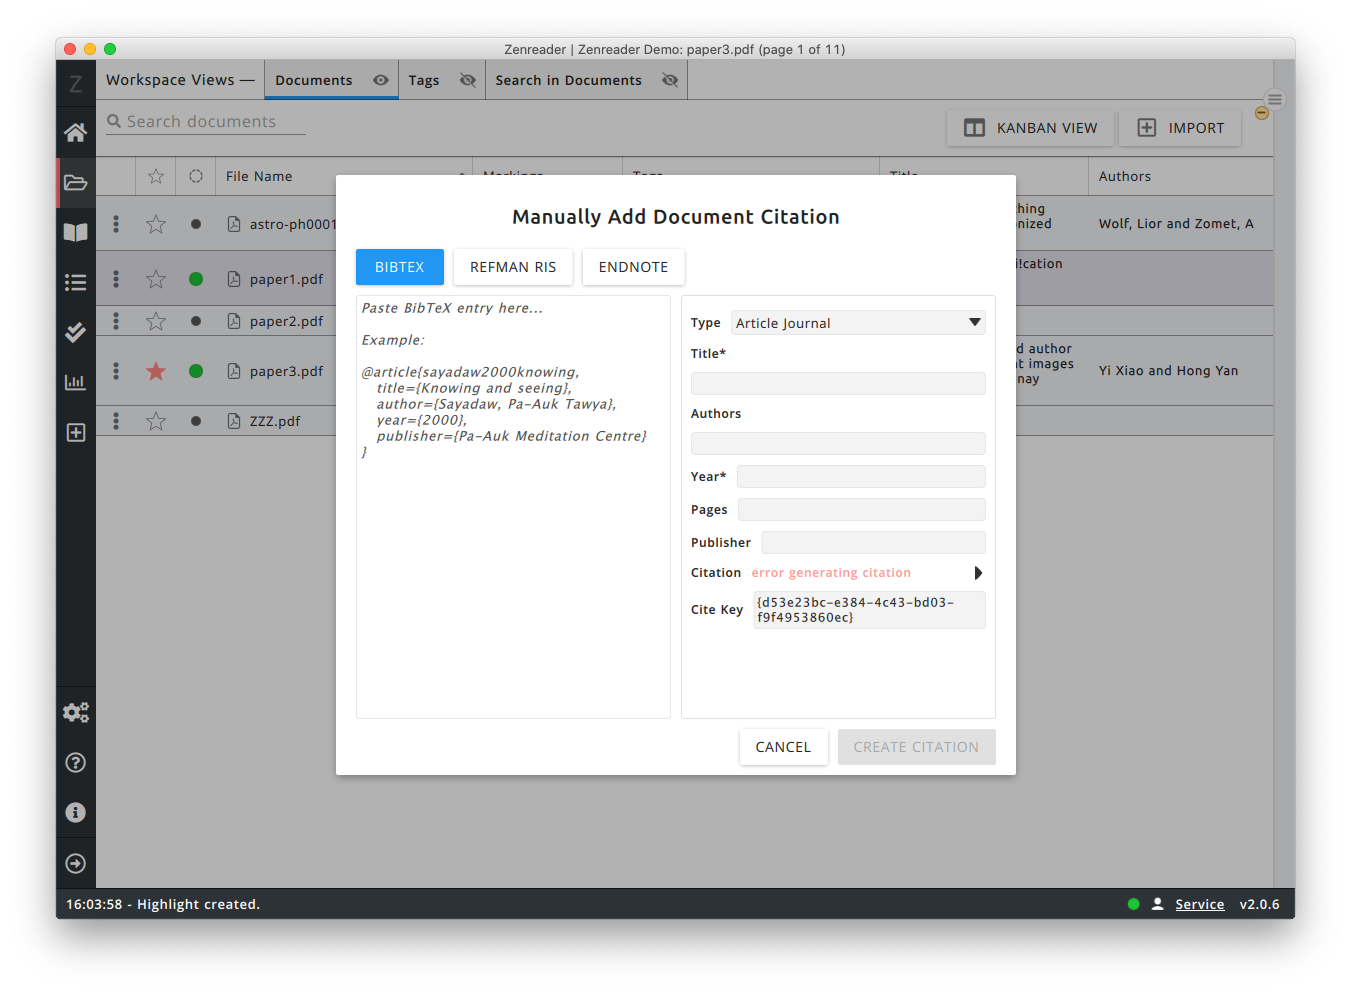
Adding Citations Manually
In Zenreader, you can add a Reference directly.
With a project open, navigate to the Project Workspace screen. Click Import and choose Add citation manually.
Just paste the BibTeX, Endnote or RefMan citation text into the box on the left and then choose Create Citation.
Importing Bibliographies
In Zenreader, you can import a Reference library exported from Mendeley, Endnote, Refman and various other reference management softwares.
Export your reference Library in any of the following formats: BibTeX .bib, Endnote .xml or .enl and RefMan .ris
With a project open, navigate to the Project Workspace screen. Click Import and choose Import Bibliography.
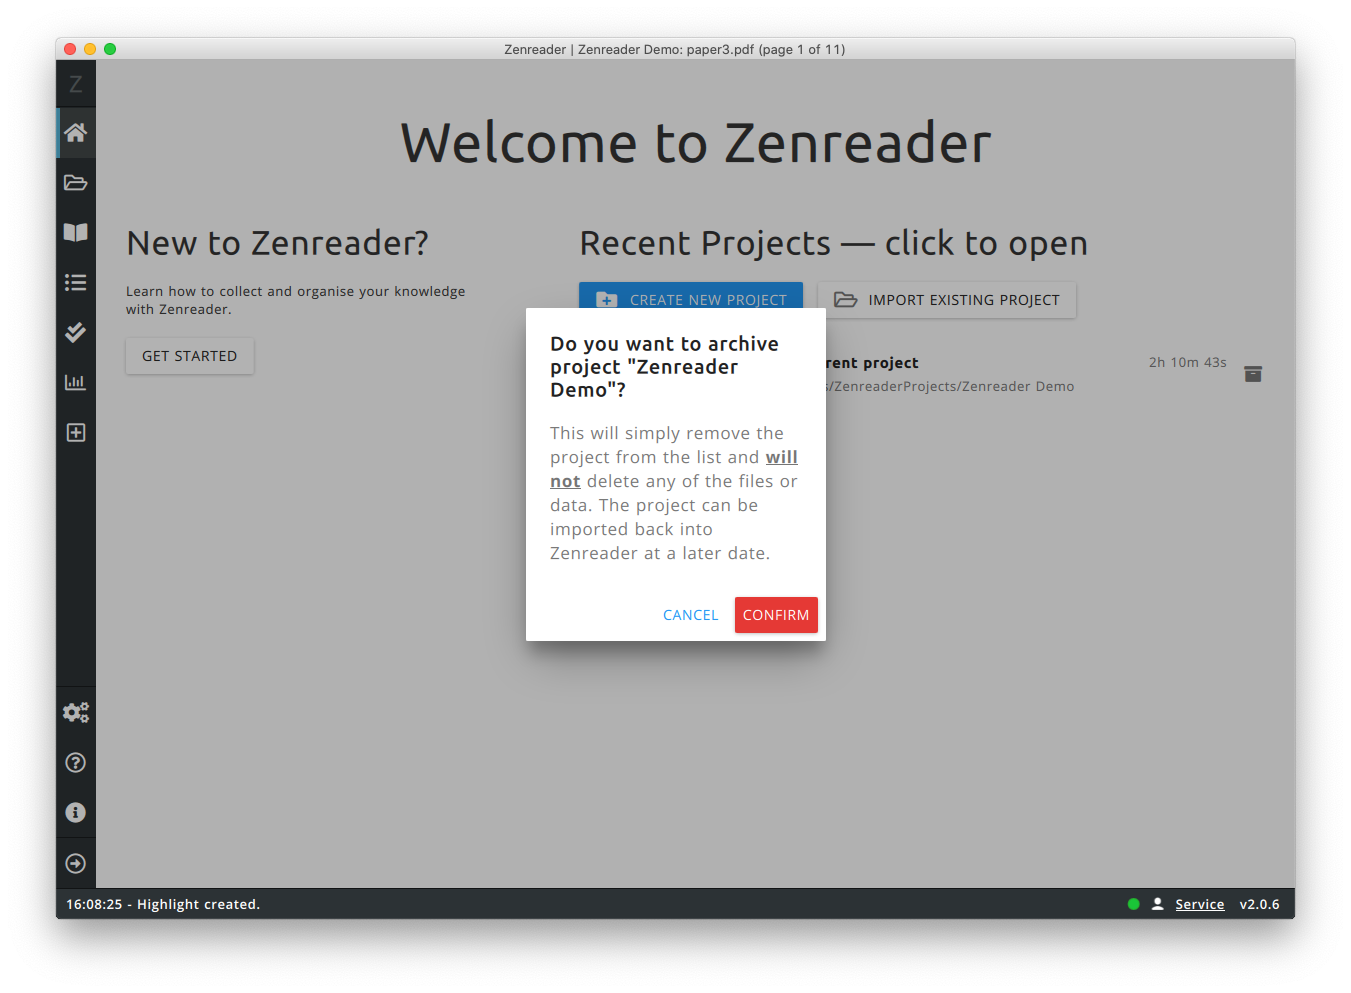
Remove a Project
You can remove a project from the list of projects by clicking the archive icon. This will remove the project from the list, but will not delete the data from your computer. The project folder will remain intact.
You may then import the project again.
Permanently Deleting a Project
To permanently delete a project, first remove it from the list of projects as described above. Then, go to the folder where the project was located and move it to Trash.
Open documents for reading
You may double click a document in the documents table or Kanban board to open it in the Reader workspace.
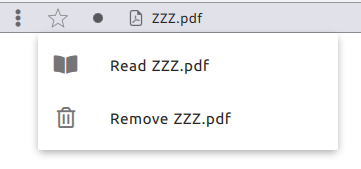
You can also click the drop-down menu at the start of the document's row in the table view, which will bring up the option to read the document.
You may also open the document from the Inspector Panel, by clicking the Read button in the Document Information widget.
The first time you do this, Zenreader analyses the text of the document, indexing it, so that the document appears in the global search results.
