Outliner Workspace
Outlines are a rapid way to draft and organise your notes and thoughts.
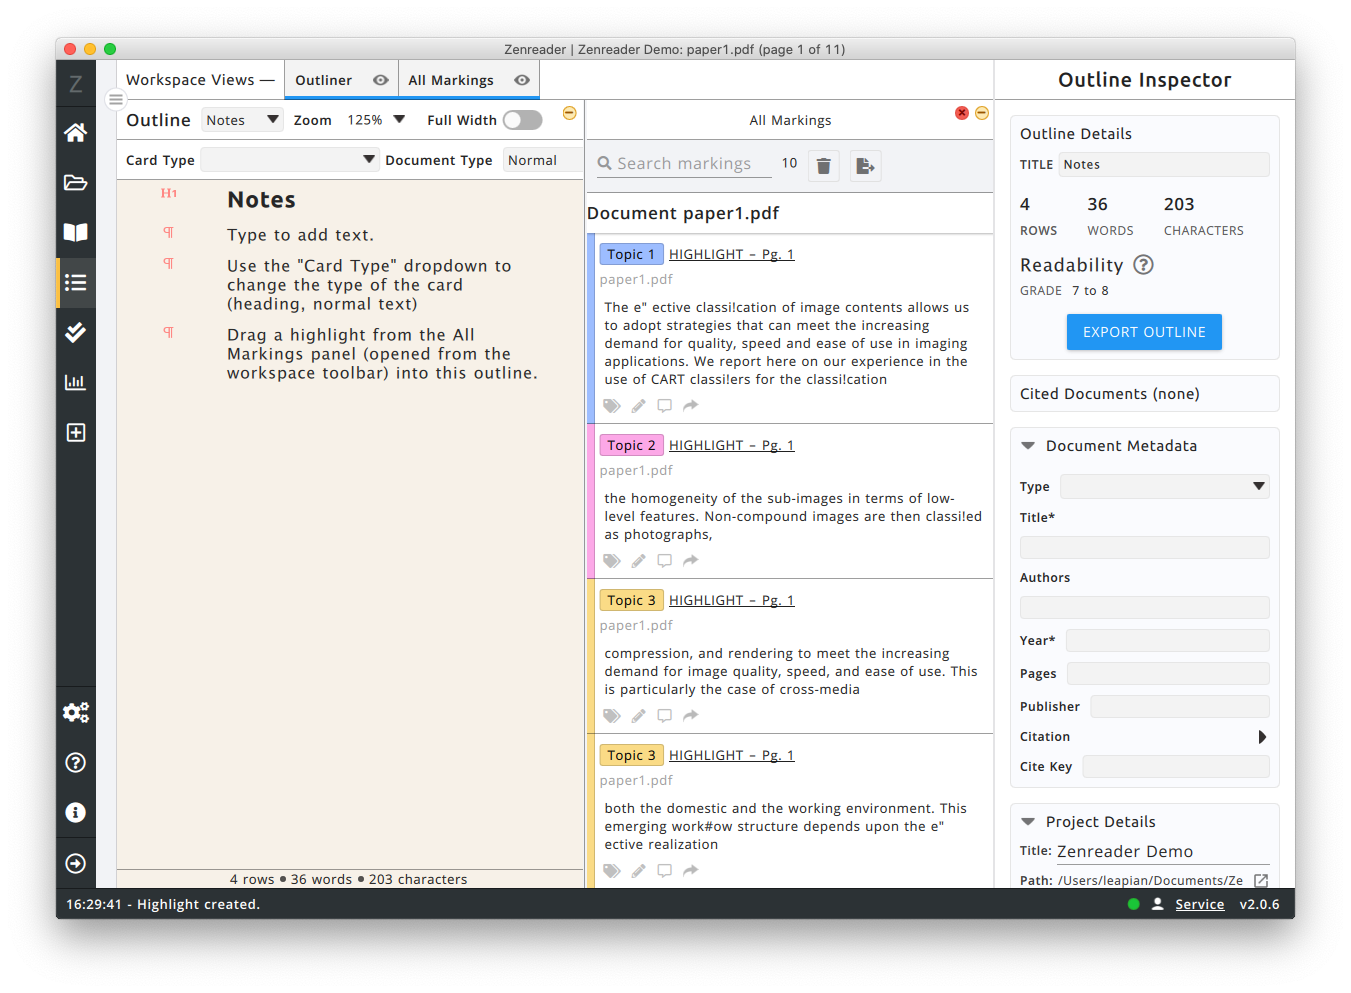
Workspace Panels
- Outliner - This is the ouline document panel. Here is where you type your notes.
- All Markings - This shows all of the highlights and annotations that you have created in the project.
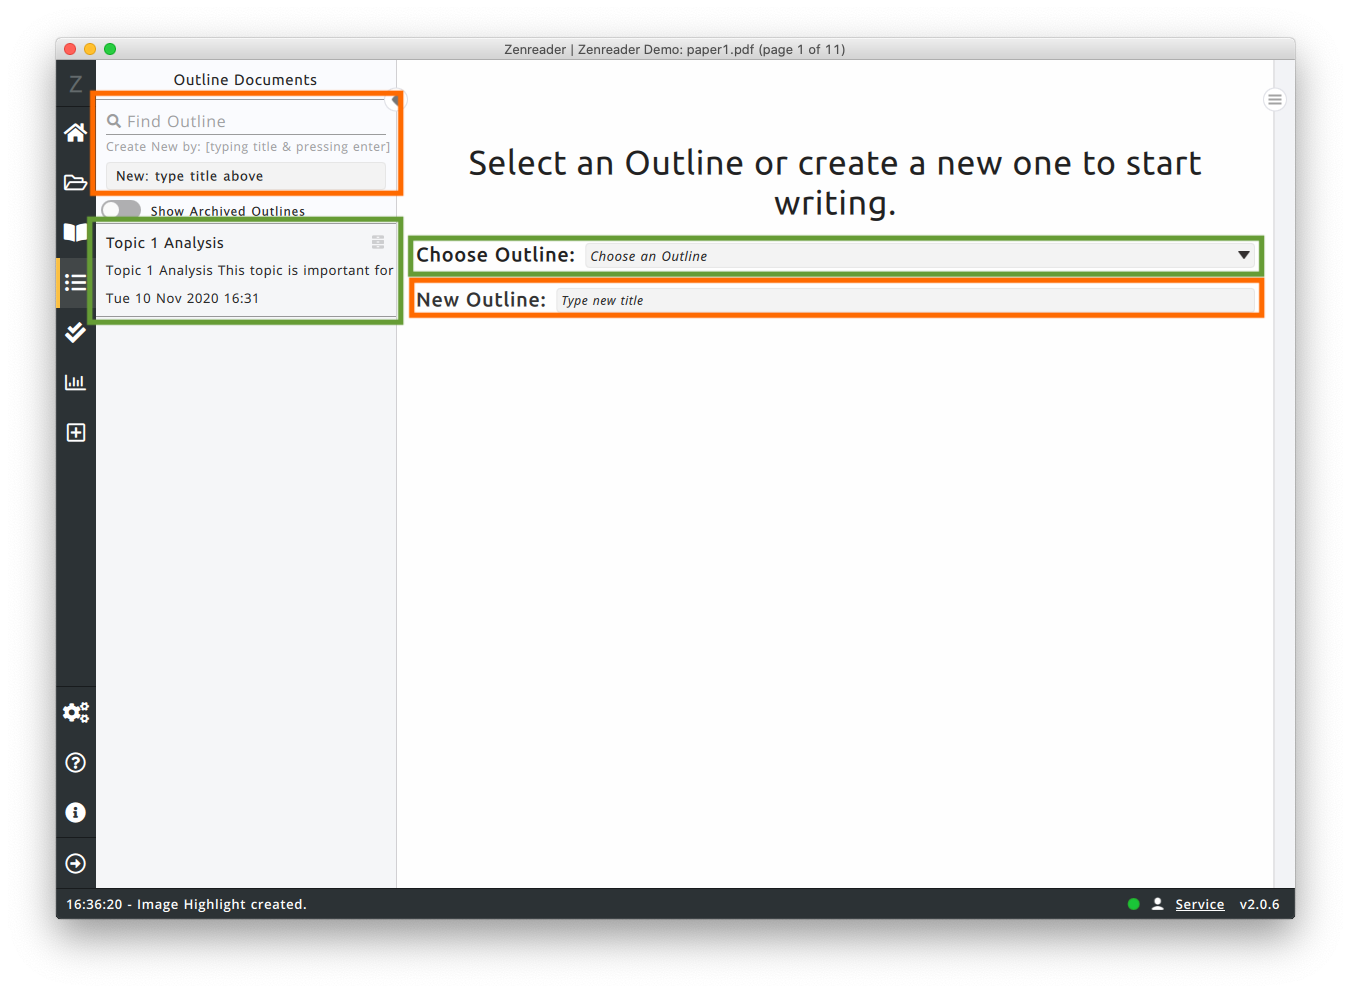
Create a new Outline
When you first access the Outliner Workspace, with an open project, you'll be asked to:
-
A| Open an existing Outline, by clicking the outline name in the left sidebar; or by clicking the "Choose Outline" drop-down.
-
B| Create a new Outline, by typing a new name and pressing
enteron the keyboard in any of the text boxes highlighted in orange.
Writing Outlines
Once you have opened an outline, adding content is very easy. It is like typing in any standard text processor.
Toolbar

- Outline Dropdown - This shows the current Outline being edited. Clicking on the dropdown, will present the list of all other outlines, so that you can rapidly switch between them.
- Card Type - When you select a card in the outline, the Card Type will show here. You can use this drop-down to change the card type.
- Document Type - Outline cards can be indented (nested) or not. Use this option to change the type of document.
- Zoom - This allows you to scale the size of the text of the outline.
- Full Width - This allows you to expand the text to the full available width of the panel.
Creating Cards
With a card in the outline selected, pressing enter on the keyboard will create a new "card" which is inserted into the outline.
There are different types of cards:
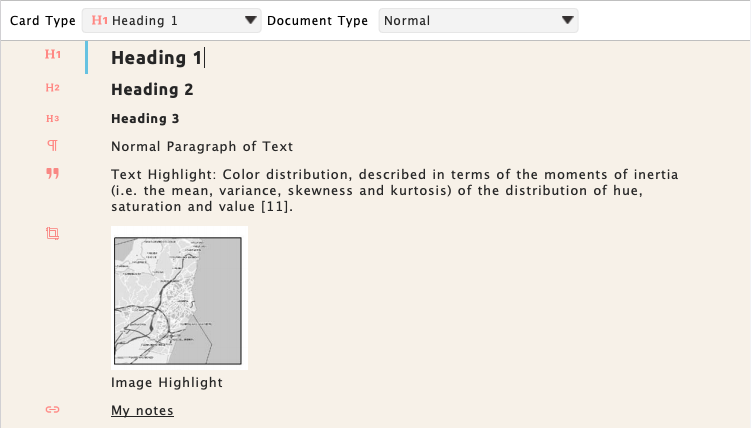
H1- Large headingH2- Medium headingH3- Small headingP- Normal paragraph of text"- A text highlight that has been dragged into the outline from the Markings Panelcrop- An image highlight that has been dragged into the outline from the Markings Panellink- A link to another Outline that has been dragged from the Outline Documents sidebar
Rapidly opening linked outlines or highlights
Clicking on the link icon, will immediately open the linked outline
Clicking on the crop or quote icon, will open up the relevant document and take you to the exact location of the highlight
Anatomy of a Card

- Type Icon - Indicates the type of this outline. This can be clicked for additional functionality (see: "Rapidly opening linked outlines or highlights").
- Card Drag Handle - These 4 dots can be used to drag the card around. Click and hold down your mouse button to move the card around. Release the mouse to drop.
- Comments - You can type comments by clicking the comment icon. This will show the comments text edit. The Curly arrow allows you to convert the comments into a new card just under this one.
Changing Card Type
To change the card type from normal to one of the headings:
- Select the card
- Use the Card Type dropdown to change the type
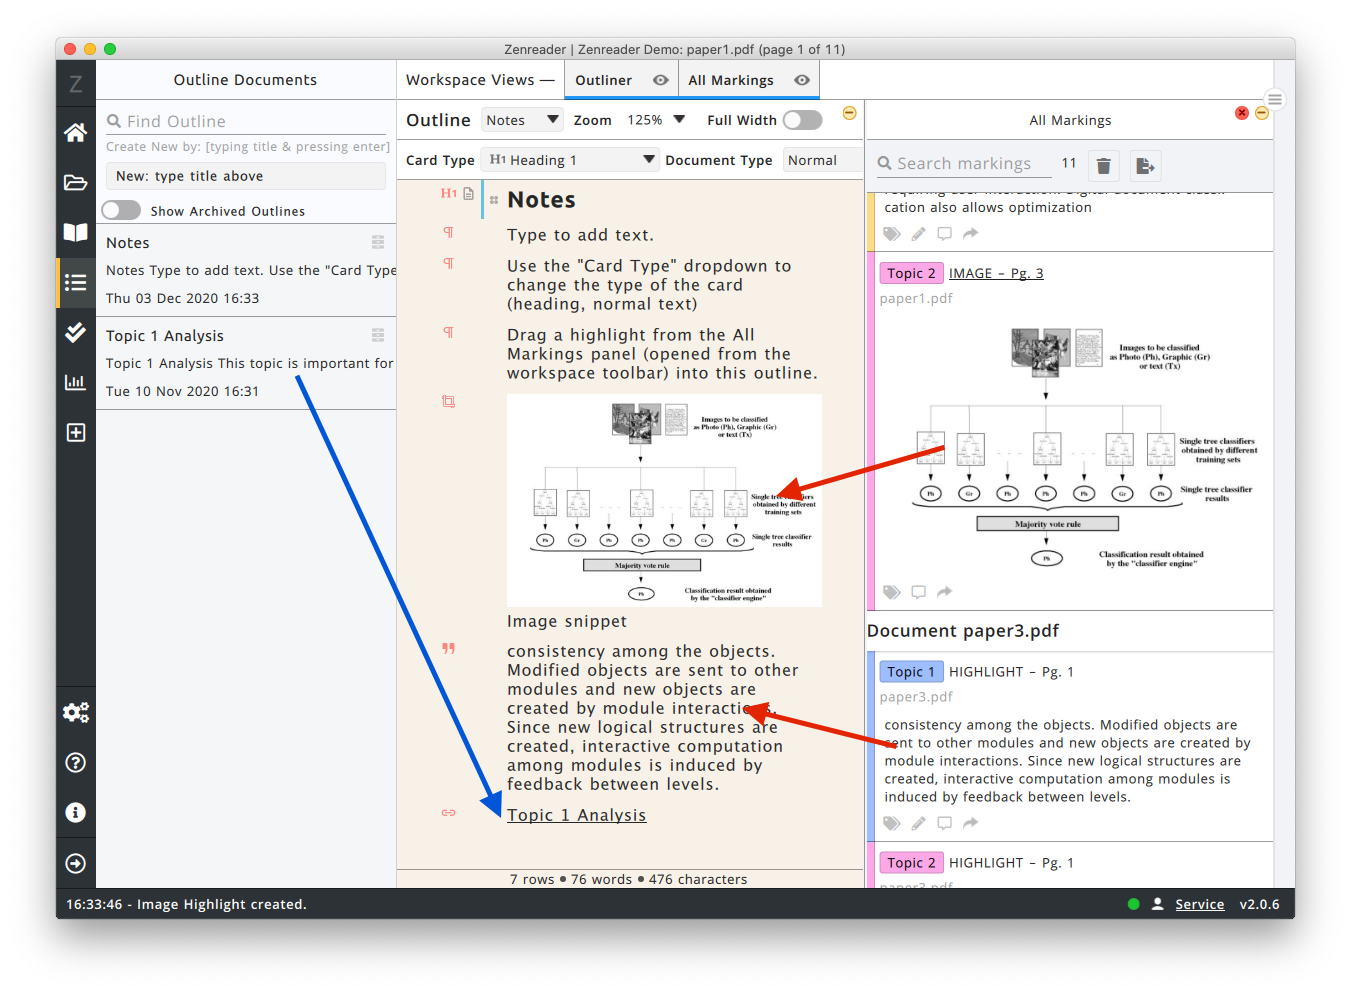
Dragging & Dropping
You may re-arrange cards within the outline by selecting a card and using the drag handle.
You may drag other content into the outline:
- Markings from the Markings Panel
- Outlines from the Outline Documents Sidebar
Delete an Outline
To delete an Outline:
- Open the Outliner Workspace
- Open the Left Sidebar, which will show the list of Outline Documents
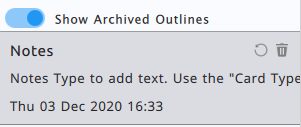
- Click the
archiveicon next to the outline name.
To permanently delete an Outline:
- Open the Outliner Workspace
- Open the Left Sidebar, which will show the list of Outline Documents
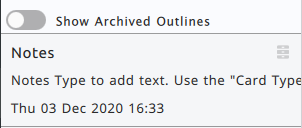
- Click the "Showing Deleted Outlines" switch. This will then present all the deleted outlines.
- Click the
bin/wasteicon next to the outline name to permanently delete - Click the
curly arrowicon next to the outline name to restore.
Outline Inspector
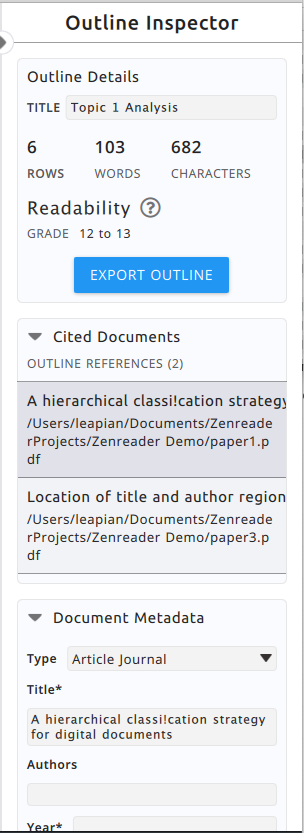
Outline Details Widget
- You can type a new
title - You can see the number of rows, words and characters
- The Readability score indictates the level of complexity of the language in the outline
Export Outline Widget
Use this widget to export the outline into various formats.
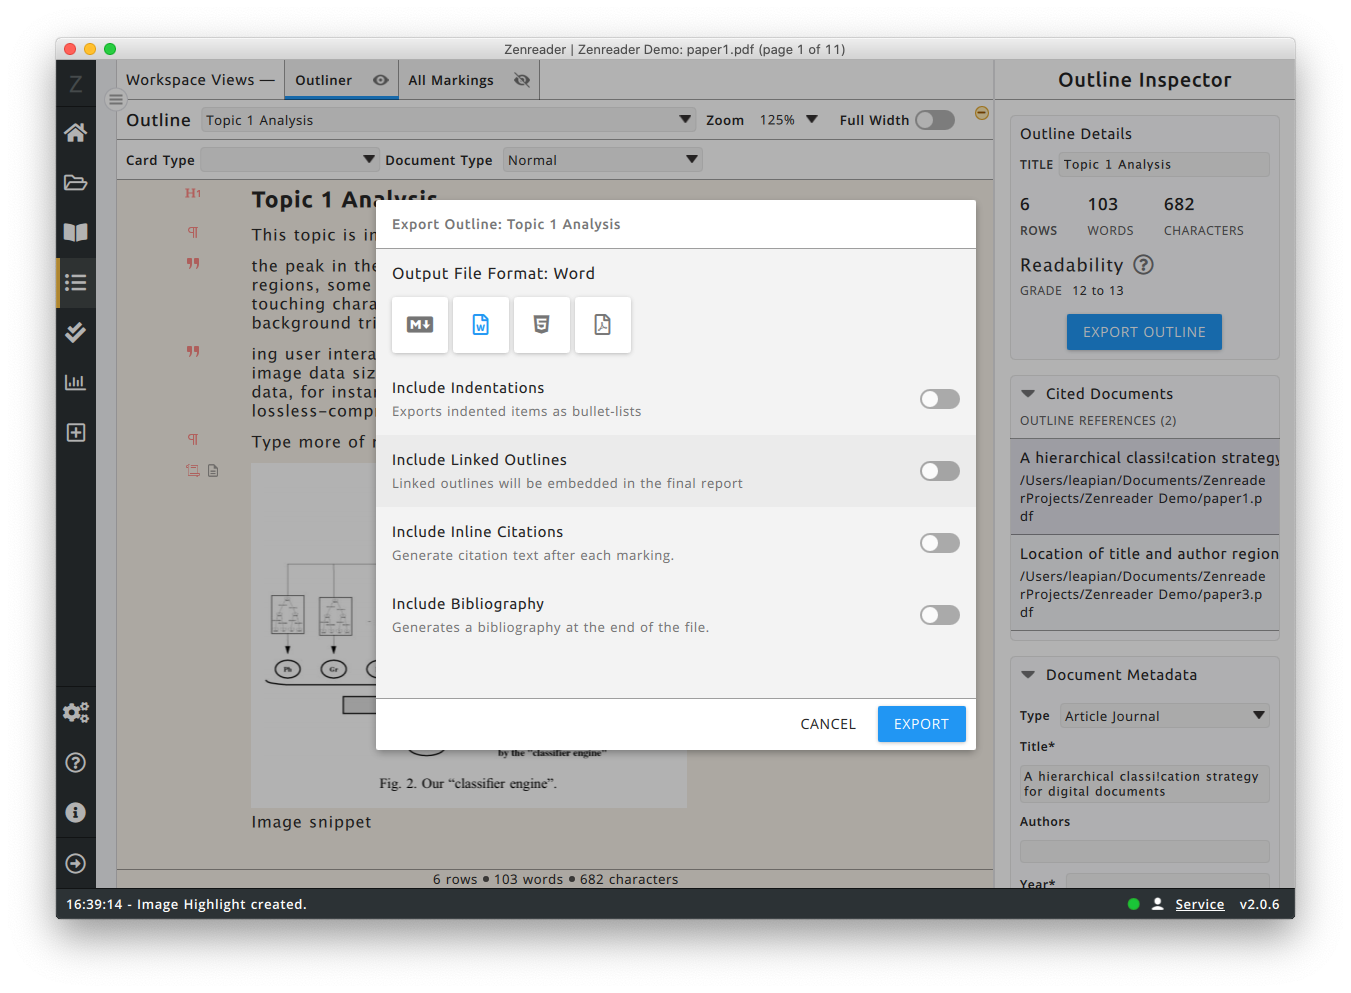
- File Format - Choose between Markdown, Word, HTML or PDF for the output file format.
- Include Indentations - Whether the output document should show indentations [only valid if the Outline mode is set to have indentations]
- Include Linked Outlines - Whether any outlines linked by this outline should also be embedded in the final output
- Include Inline Citations - Whether each Marking in the outline should be exported with a citation at the exact location where that marking appears in the text. This is great if you want to then replace that text with the the relevant Citation using the Reference tools of your favourite word processor.
- Include Bibliography Section - Whether Zenreader should generate a Bibliography section with all the cited documents at the end of the exported document
Cited Documents
When you drop Markings into the Outline, those markings carry information of the document they belong to. Hence Zenreader automatically shows you a list of citations.
Clicking on any of the cited documents in the list, populates the Document Metadata Widget