Getting Started
Master Zenreader in < 1hr with our video tutorials
We have released a series of 6 video tutorials that show you how to master Zenreader.
- Getting started: learn the basics
- Import documents & references: complete import tutorial
- Highlighting: complete note taking tutorial
- Tagging: how to use tags effectively
- Outlines: draft your work
- Kanban: manage your project work & focus
Have a look at these tutorials so that you can make the most of Zenreader and boost your productivity.
Visit our YouTube channel and Subscribe so that you’re notified when new tutorials or guides are released.
This is a short tutorial on using Zenreader. Follow the links for a more detailed guide (we suggest opening each link in a separate tab).
Install Zenreader
For any errors with the installation, please read our additional guides in the Install documentation.
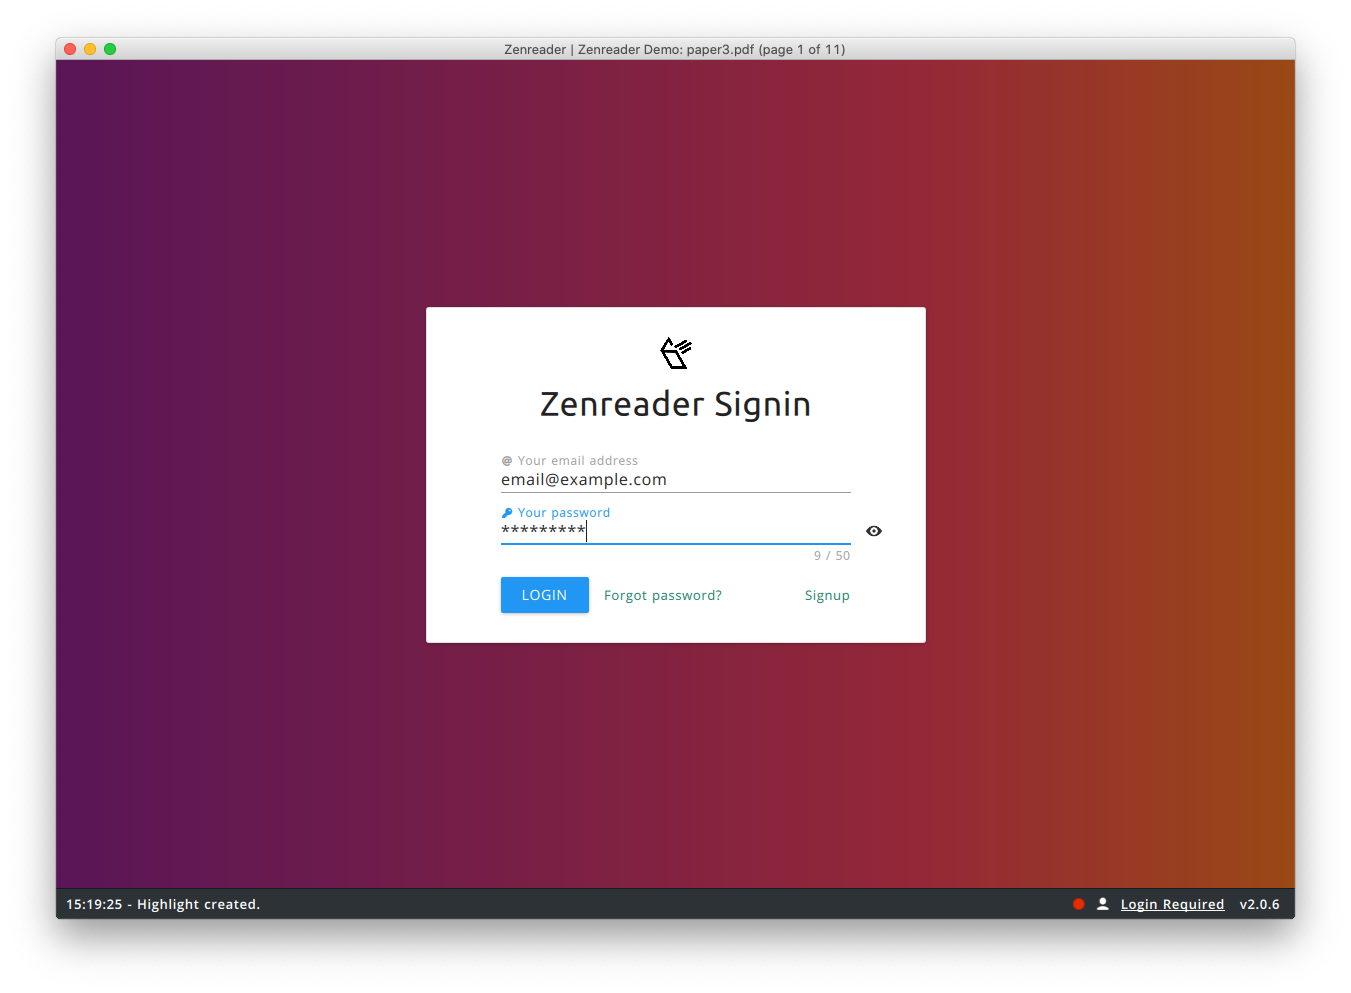
- 2| Create an Account
Create an account on our website.
Once you install and launch Zenreader, enter your email and password to log in.
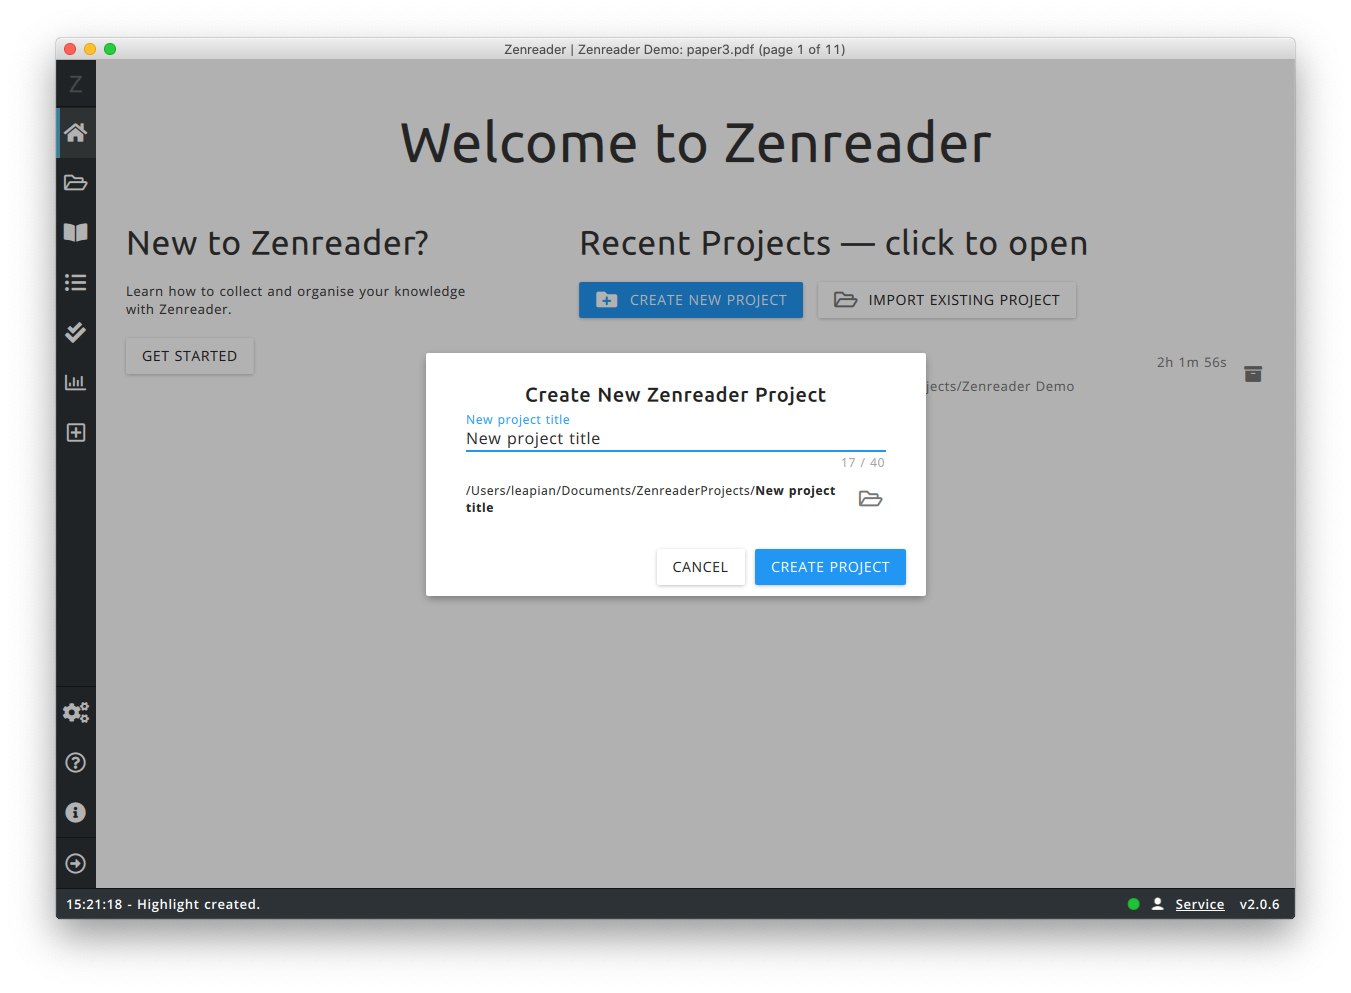
Create your first project
A project in Zenreader consists in a folder on your computer where all your project data is stored. This includes all the documents you import and any additional information that is created during the project, such as (Tags, Highlights, Tasks, Notes & more).
-
1| Click the Create Project Button
-
Enter the prefered project name
- Optional: Change the default folder where the project is stored. By default projects are saved in your Documents folder.
- Click "Create Project"
-
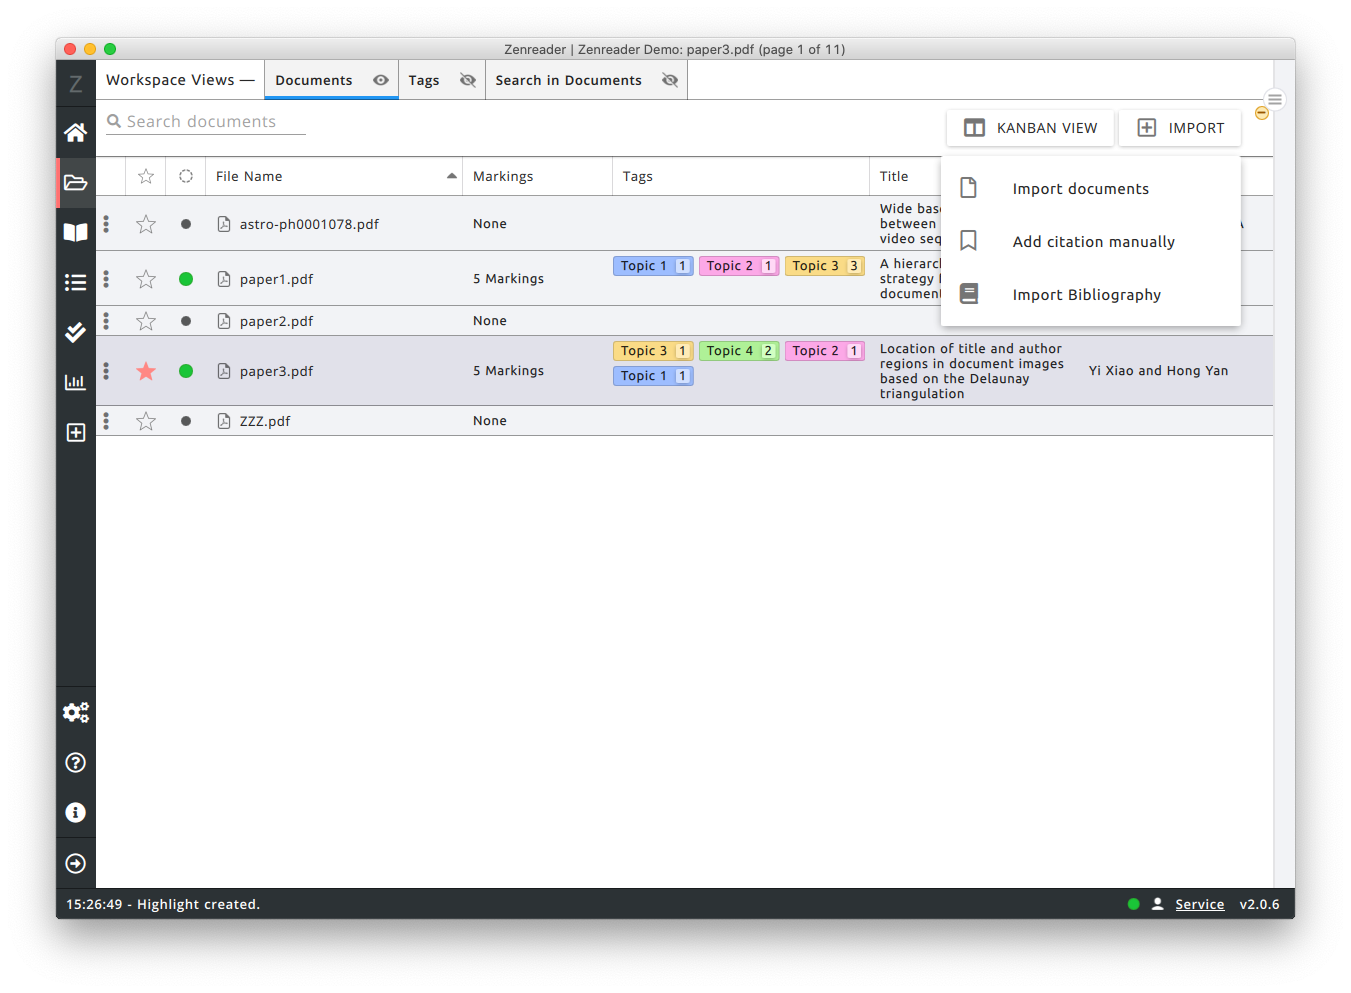
2| Import documents into the project
-
Navigate to the Documents workspace from the left side bar
- Click the import button on the right corner
- You can choose to import:
Import documents: opens the document import panelAdd citation manually: opens a panel that allows you to add a citation by pasting BibTeX, RefMan or EndNote citation.Import Bibliography: opens a panel with which you can import an entire bibligraphy exported from Mendeley, Endnote or RefMan.
Read, select and extract knowledge
-
1| Open a PDF Document from the Project Workspace
-
Double click the PDF document you want to open
-
This will automatically open the PDF in the Reader workspace
-
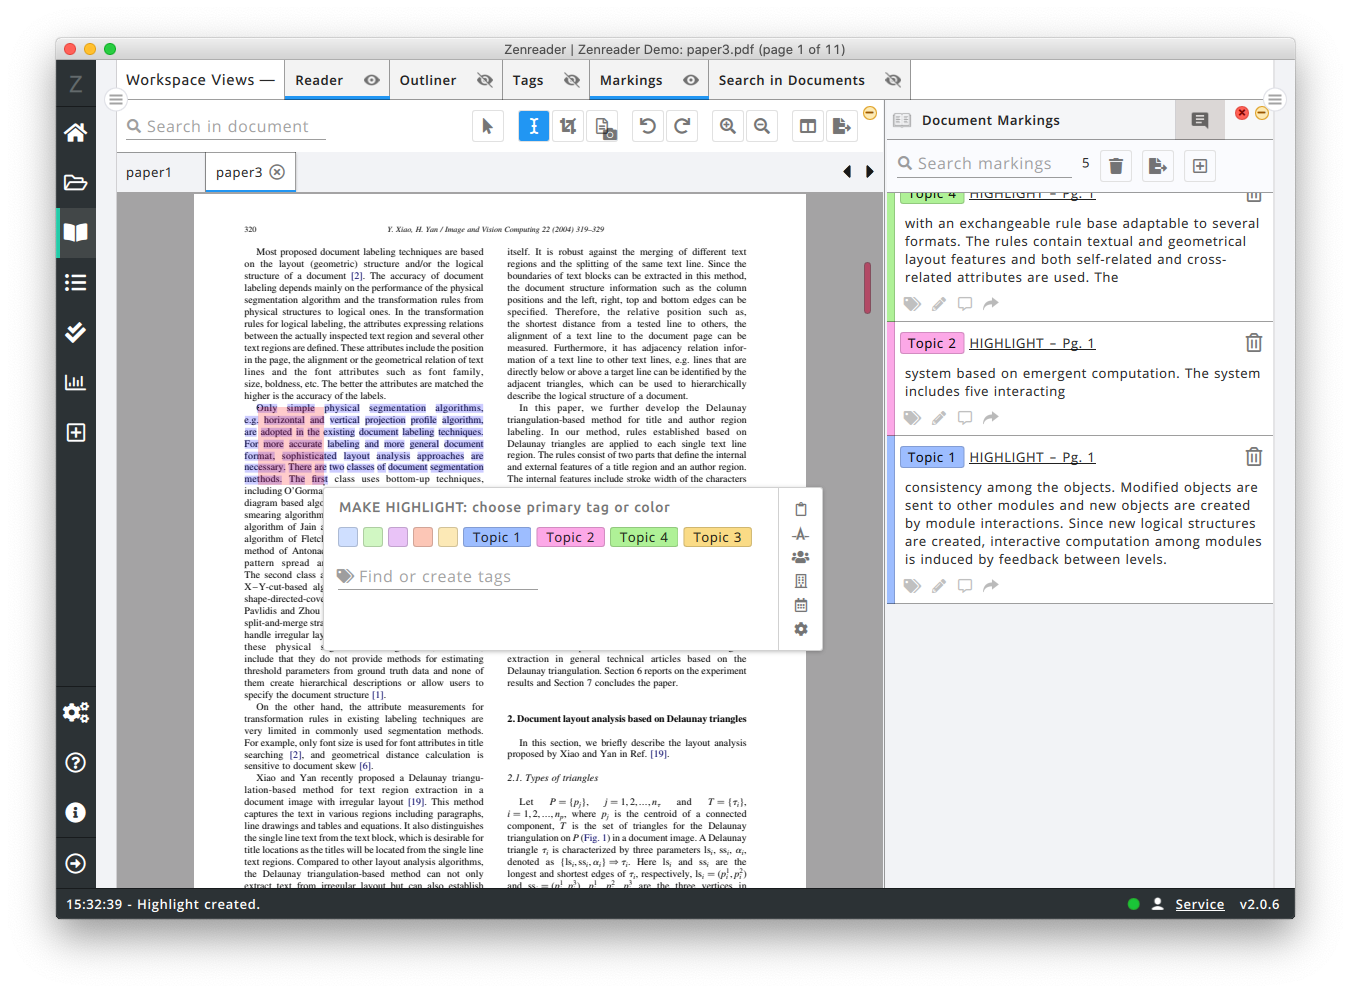
2| Create a highlight marking
-
Wait for the document to open (this may take a few seconds as Zenreader indexes all the words and analyses the content)
- To highlight: click and hold with the left mouse button on some text, until the text selection starts; then drag your mouse to select text.
- Once you have selected the relevant text, release the left mouse button: the Marking Creation panel will appear
- Choose one of the basic highlight colors to create the highlight
-
3| Create a tag for markings
-
Open the Tags panel
- In the text field, type the name of the new tag to be created
- Optional: Click on the color picker to change color
- Click
+ add tag: newtagnamebutton next to the color picker to create the tag.
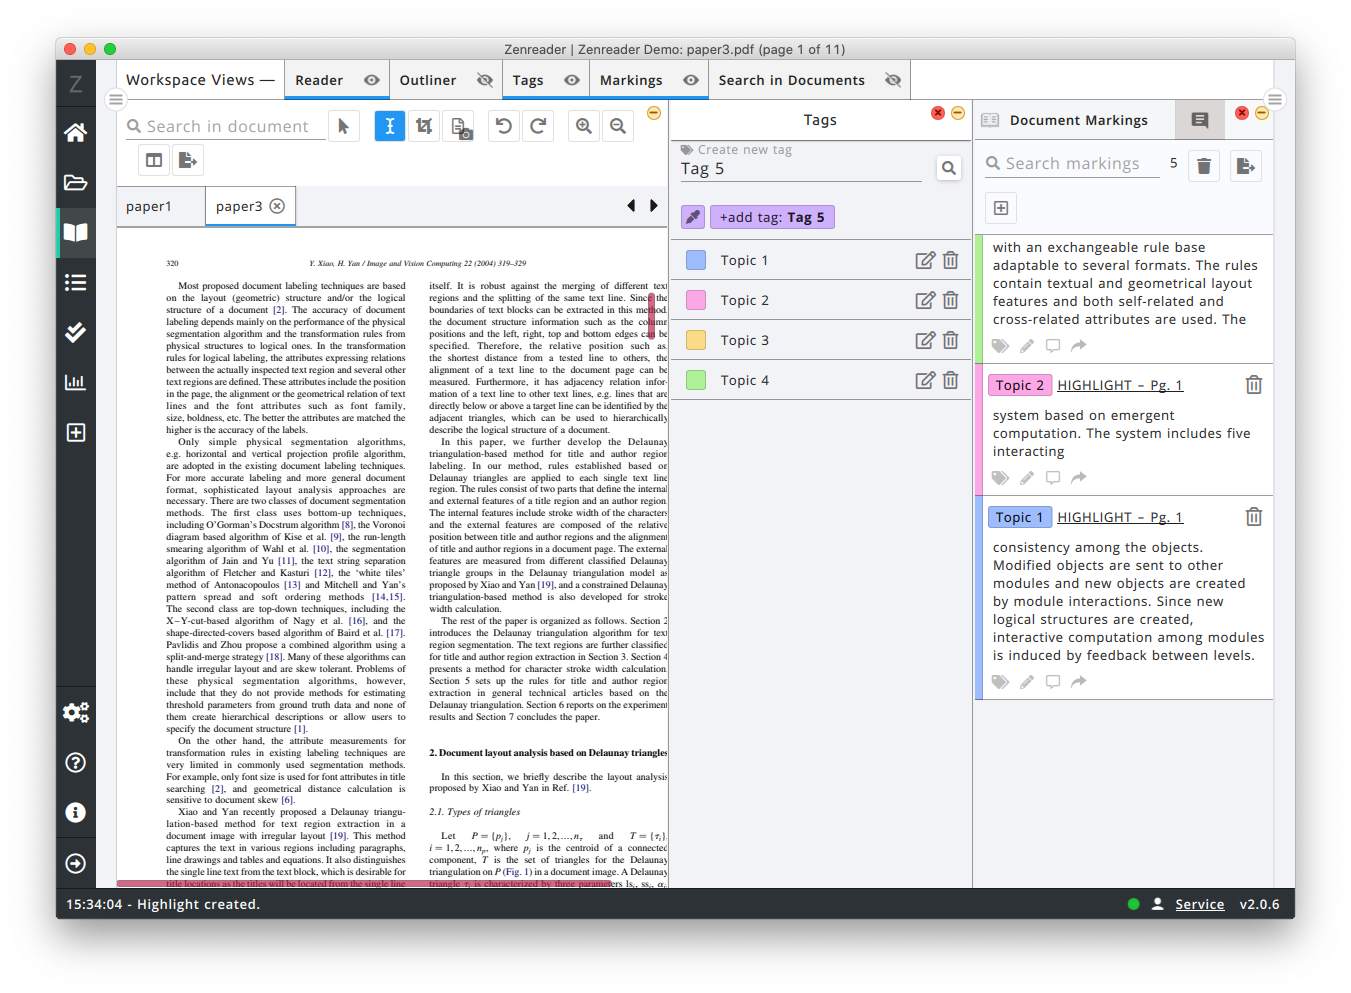
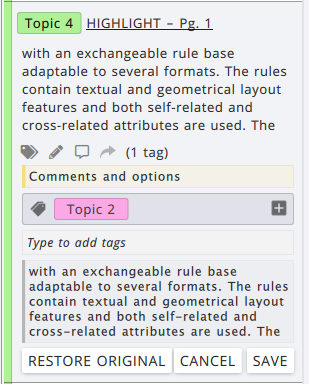
- 5| Edit your marking, adding the tag, notes
- Ensure the Markings panel is visible.
- Click the
commenticon to show the notes and comments box - Click the
tagsicon to show the tags box - Click the
pencilicon to show a box that allows you to edit / paraphrase the highlight text
Visit Reader Worskpace Page for more details on tags, markings and using the Reader.
Organise and draft
-
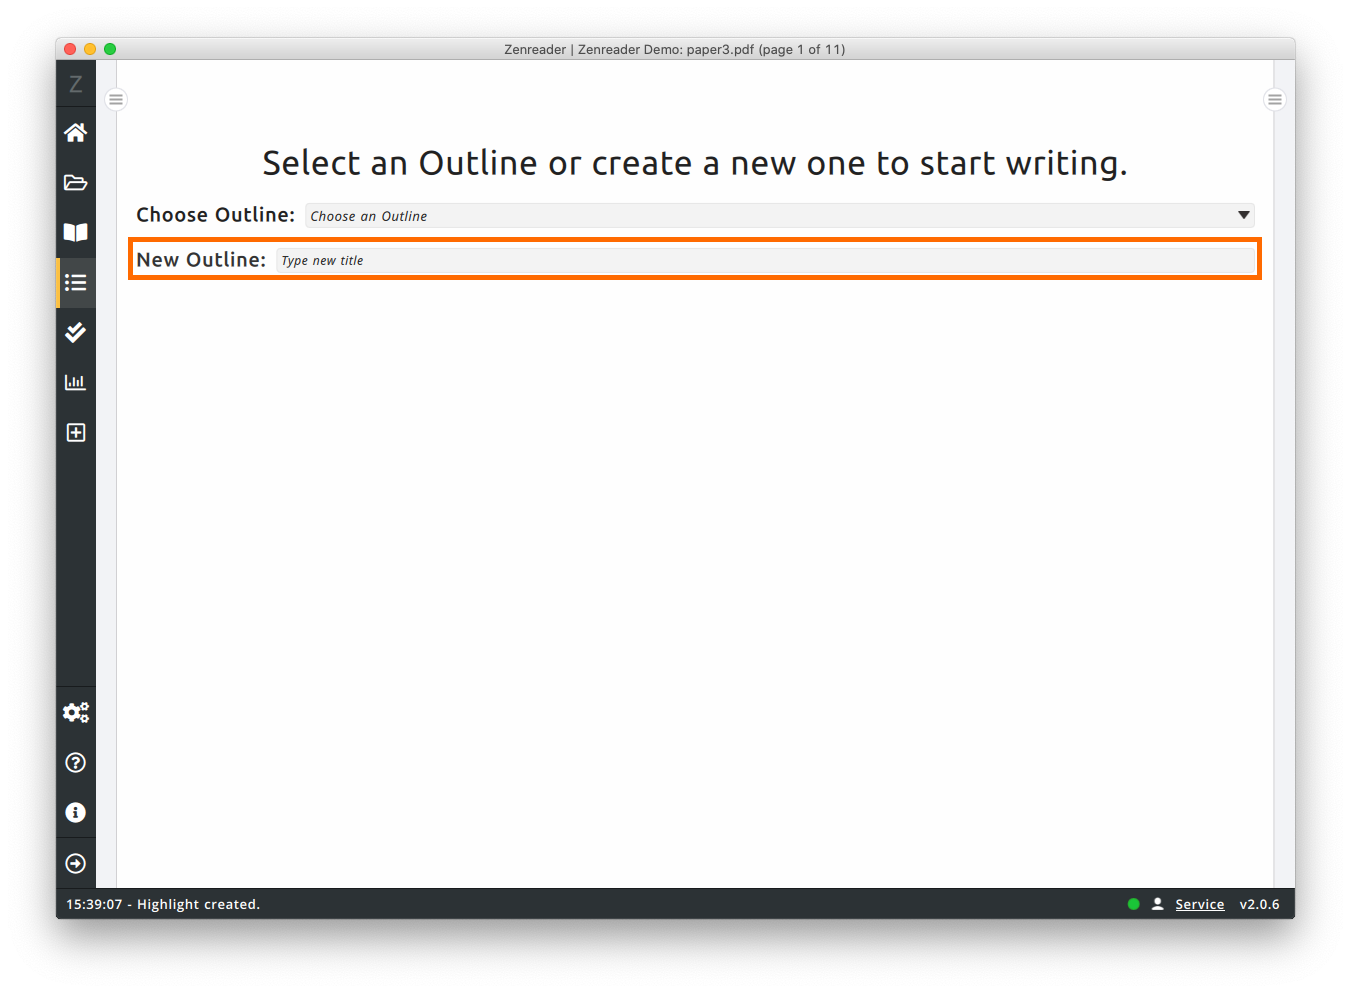
1| Open the Outliner Workspace
-
2| Create a new Outline
-
Type a new outline name
- Press enter on your keyboard to create
-
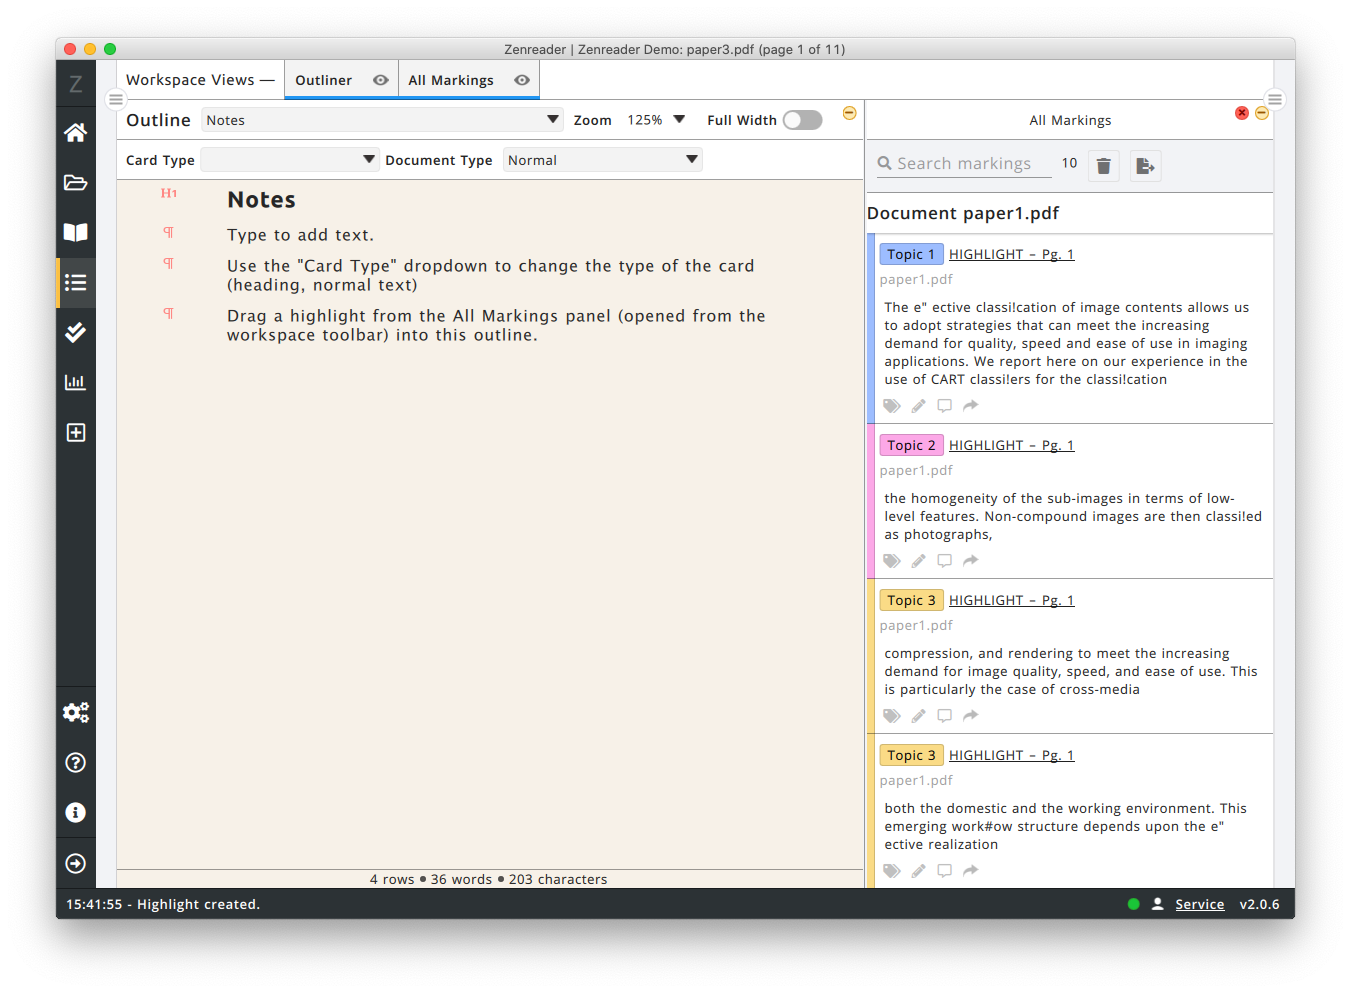
3| Add outline cards
-
In the Ouline, type text as normal, to add content
- Pressing
enteron the keyboard to create a newcard - Use the "Card Type" dropdown to change a normal text card into a heading and vice-versa
-
4| Drag & Drop Markings
-
Drag a marking from the "All Markings" sidebar into the outline
Visit the Outliner Workspace Page for more details about managing outlines and writing outlines.
Export your work
Visit the Export guide for instructions on exporting your work.
Cloud Synchronisation and multi-device access
We are working hard to make this feature available as soon as possible.
You can follow this cloud sync guide to use Google Drive or Dropbox for synchronising projects across machines.
Team collaboration
We are working hard to make this feature available as soon as possible.
You can follow this cloud sync guide to use Google Drive or Dropbox for collaborating on projects.
Suggestions and Improvements
We are looking to improve Zenreader with your valuable suggestions.