Reader Workspace
In the Reader Workspace, you read PDF documents, make annotations and organise these rapidly.

Workspace Panels
- Reader - This is the PDF Reader.
- Outliner - This panel shows the Outliner, which is used to aggregate and type notes.
- Tags - Create and modify tags that are used to rapidly organise your notes.
- Markings - This shows all of the highlights and annotations that you have created.
- Search in Documents - Search across all of the project documents.
PDF Reader Toolbar

- Searchbar - searches inside the current document.
- Cursor Mode - click to select or click and drag to move / press and hold to select.
- Highlight Mode: Text highlight, Image Crop, OCR (Optical Character Recognition, converting image to text).
- Page Rotation
- Zoom In/Out
- Preview - opens up a small preview of the whole document, making it very quick for you to jump sections.
- Export - allows you to export the PDF with all the markings/highlights applied to it.
Making Highlights
When you select a part of the document to create an annotation, the annotation panel pops up.
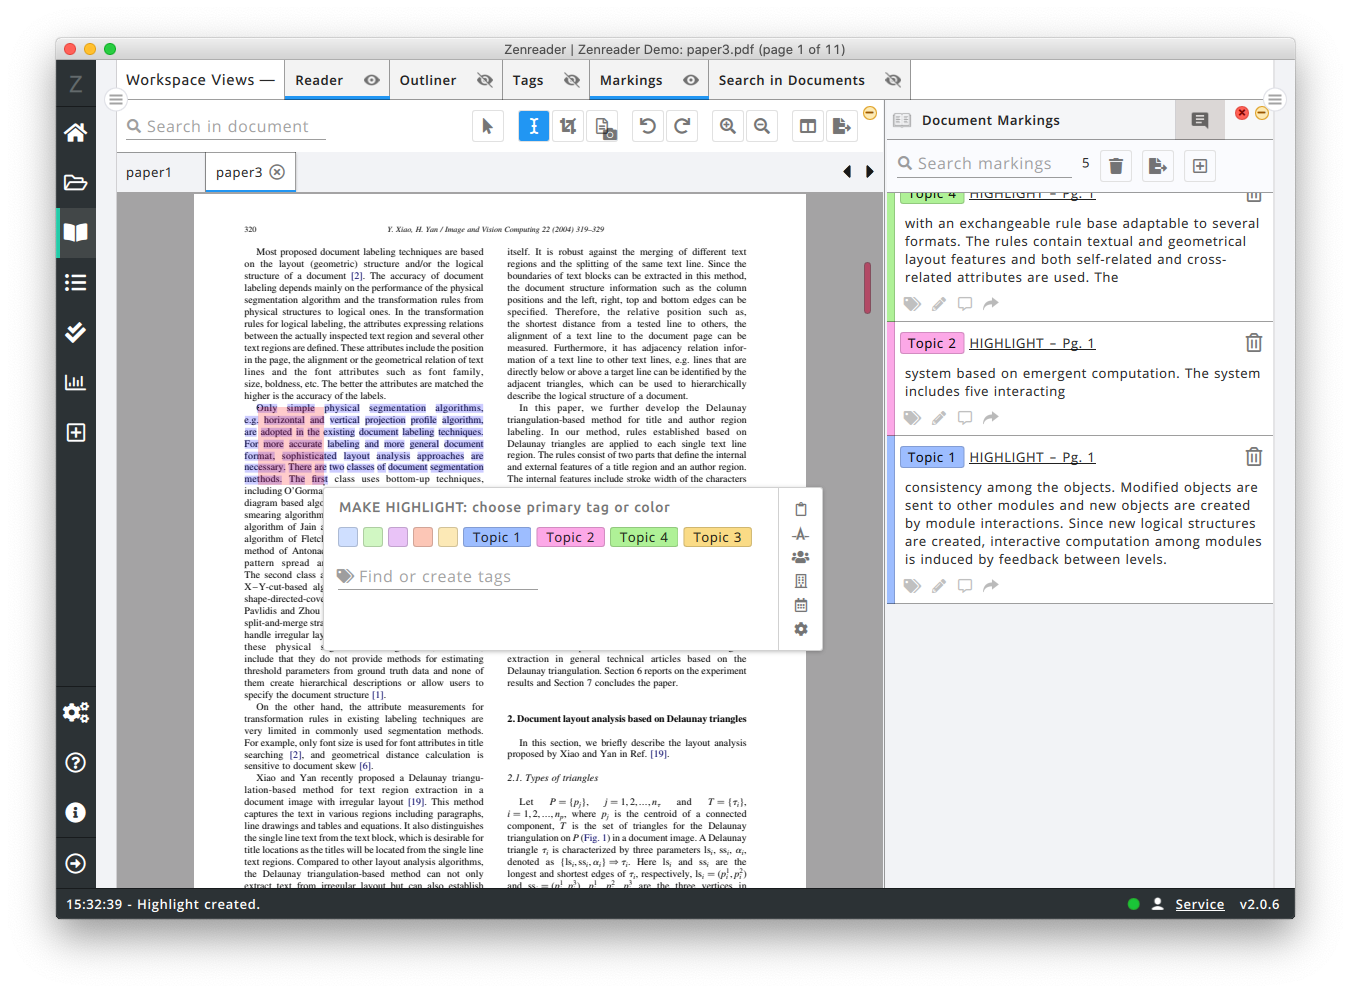
Click on one of the highlight colors, or choose a tag, to complete the annotation creation. You can create new tags directly in this panel and then apply the new tag onto the highlight.
In the annotation panel, you also have small buttons on the right hand side: these allow you to
- Copy the selection to clipboard
- Set the selected text as Title, Authors, Year, Publisher
- Open the highlight settings to customise the experience.
Highlight Tools
Text: - In this mode, you drag your mouse across the text you wish to highlight. In the annotation panel you then select the color / tag to complete the operation. The highlighted text will appear in the Markings panel.
Image: - To extract images or tables use the image crop tool. In this mode, drag your mouse around the area of the documenent you want to extract as an image. Choose the selection color in the panel to complete the creation of this marking. The selected image then appears in the Markings panel.
 -
OCR: - (Optical Character Recognition) Some PDFs are just a collection of images without text (ie. when the PDF is generated from a scanned document). The OCR tool is used to select an area of a document and convert the contents of that area into text. The OCR tool currently converts images to english text and other languages will be supported soon. Once you have selected an area of the document to convert, choose the marking color and then wait for the OCR engine to complete the operation. The OCR highlight will then appear in the Markings panel.
 -
Equation: - In this mode, you select an area on a PDF around an equation. Zenreader extracts that area as an image and sends the image to Mathpix OCR. Mathpix OCR then converts the image to LaTeX and Zenreader stores the result as a highlight. This is a premium feature and requires you to have setup the Mathpix OCR integration within Zenreader.
Markings Panel
In this panel you can see all the annotations and markings made on the current document, or on all the documents in the project.
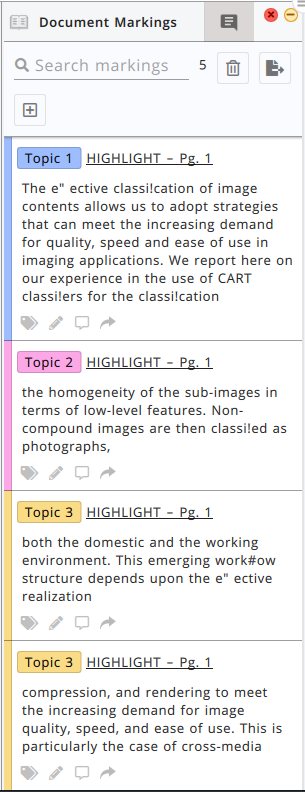
Each Marking shows the color, the tag used at the moment of creating the marking and the type.
The light gray icons at the bottom of each marking allow you to peform various actions:
tags- Shows the additional tags list.pencil- Edit the original highlight text, enabling you to paraphrase the highlight or correct minor text errors.comment- Shows the comment box, where you can type additional notes.arrow- Click this and Zenreader will jump to the exact location of this highlight in the document.
Changing the Highlight Principal Tag
Clicking on the principal tag (the tag or color next to the title of each Marking) brings up a popup panel that allows you to change the highlight to a different tag.
Tags Panel
You can use tags to rapidly organise your highlights and annotations. Each tag comes with a color and a tag name. You can create, edit and delete tags from the Tags panel in the Reader Workspace.
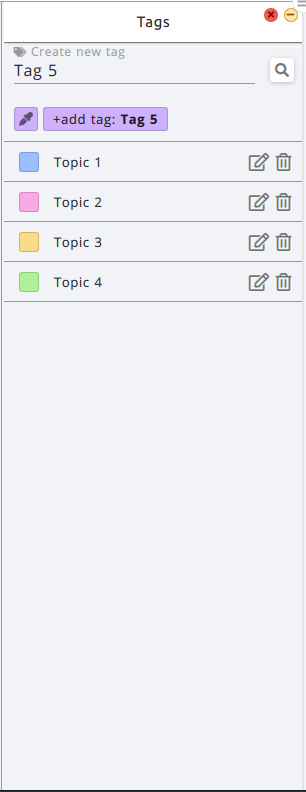
Creating a new Tag
- In the text field, type the name of the new tag to be created
- Optional: Click on the color picker to change color
- Click
+ add tag: newtagnamebutton next to the color picker to create the tag.
Editing tags
- Tap on the tag's color square to open the color picker.
- Click the
editicon to show the tag name change field
Changes propagate automatically
Renaming or changing color of an existing tag will automatically propagte throughout Zenreader, updating all locations where this tag has been used, including changing the highlight color!
Search in documents
Type your search term in the Reader search bar. As soon as you do so, the search panel appears. You can further refine your search.
